Pattern 11 of 12 · Advanced · To Wear
Rope & Twist
Cables, a thumb gusset, and the discipline of a matching pair
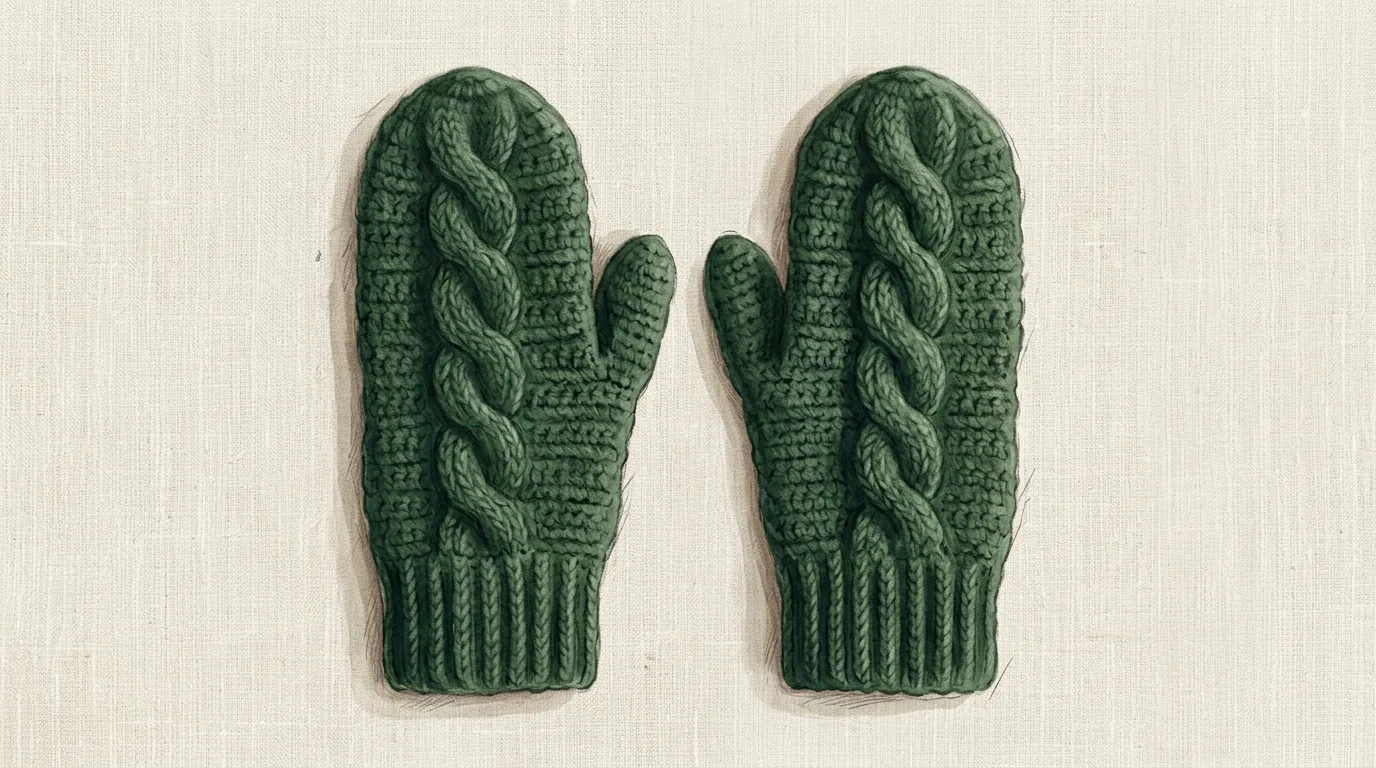
Design illustration. Colours and drape will vary with your yarn — this is a rendering of the design, not a photograph of a finished piece.
About this pattern
Cables are post stitches that refuse to stay in their own column. By skipping two stitches, working around the next two, and then going back for the ones you skipped, you make two ropes cross over each other — and repeating that every four rounds sends a twist travelling up the back of the hand.
The rest of the pattern is about fit. A thumb gusset is a wedge of increases that makes room for the base of the thumb, then gets set aside on scrap yarn while the hand carries on. And because hands come in pairs, the second mitten must be a mirror of the first rather than a copy — which is easier to get wrong than it sounds.
What this pattern teaches you
- Crochet cables using crossed post stitches
- Front post treble crochet (FPtr)
- Shaping a thumb gusset
- Holding stitches on scrap yarn and returning to them
- Working small-circumference rounds
- Making a mirrored pair
Skills you'll own by the end
Before you start: Patterns 1–10. Post stitches from Pattern 8 are essential; the rounds, increases and decreases come from Pattern 6.
Materials
| Yarn | DK weight (Category 3) wool or wool blend. Roughly 150 m / 165 yd for the pair. Wool is strongly preferred: it has the elasticity that lets cables sit up rather than sag, and it stays warm when damp, which is what a mitten is for. |
| Hook | 4.0 mm (US G-6) |
| Notions | Stitch markers (at least 4), scrap yarn for holding the thumb stitches, tapestry needle, scissors, tape measure |
Gauge
18 hdc × 14 rounds = 10 cm / 4 in worked in the round
Mittens must fit closely or they are useless — a loose mitten lets cold air in at the wrist and makes your fingers clumsy. Swatch in the round if you can, because most people work more tightly in the round than in rows, and check the cuff against the wearer's hand before committing to the whole mitten.
Choose your size
Two sizes. Instructions give Adult S/M first with Adult M/L in brackets: 32 (36) sts. Measure around the widest part of the hand, excluding the thumb.
| Size | Fits hand | Sts around | Finished circumference | Length |
|---|---|---|---|---|
| Adult S/M | 18–19 cm / 7–7½ in | 32 | 17.8 cm / 7 in | 26 cm / 10¼ in |
| Adult M/L | 20–21 cm / 8–8¼ in | 36 | 20 cm / 8 in | 27 cm / 10½ in |
Finished circumference is slightly under the hand measurement. Mittens need light negative ease so they stay put; the fabric and the ridged cuff make up the difference.
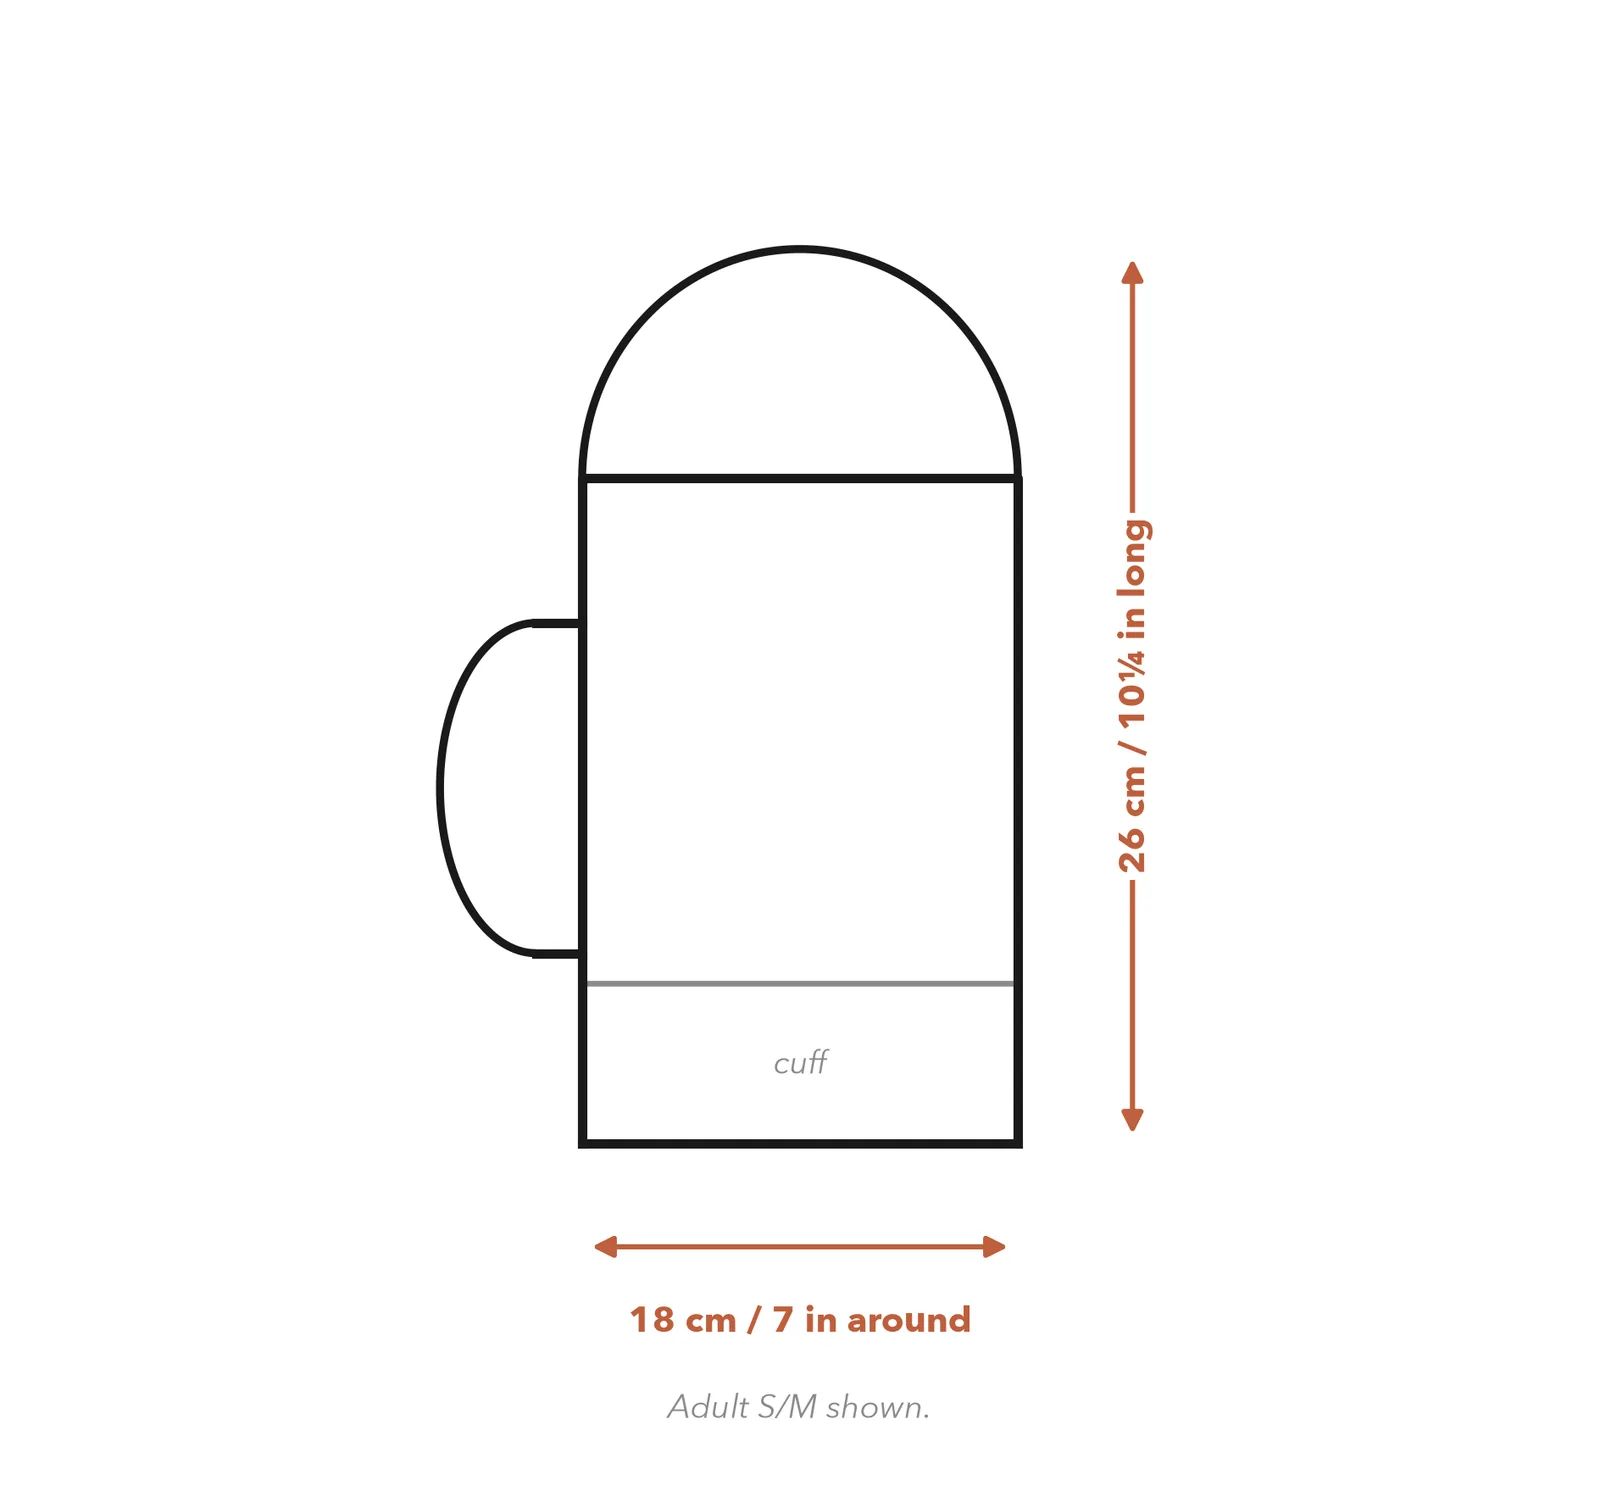
Finished measurements
Adult S/M: 17.8 cm around × 26 cm long (7 in × 10¼ in)
Abbreviations
This pattern uses US crochet terms.
| ch | chain |
| hdc | half double crochet |
| hdc2tog | half double crochet 2 together (a decrease) |
| inc | increase — 2 hdc in the same stitch |
| dec | decrease |
| FPtr | front post treble crochet |
| BPdc | back post double crochet |
| BLO | back loop only |
| sl st | slip stitch |
| sk | skip |
| st(s) | stitch(es) |
| rnd | round |
| rep | repeat |
Special stitches
Front post treble crochet (FPtr)
Exactly the front post double crochet from Pattern 8, but with an extra yarn over so it is taller.
Yarn over twice, insert the hook from the front around the post of the stitch below, yarn over and pull up a loop, then [yarn over and pull through two] three times.
The extra height matters: a cable stitch has to stretch sideways to cross over its neighbour, and a treble has the length to do that without puckering the fabric.
The cable cross (worked over 4 sts)
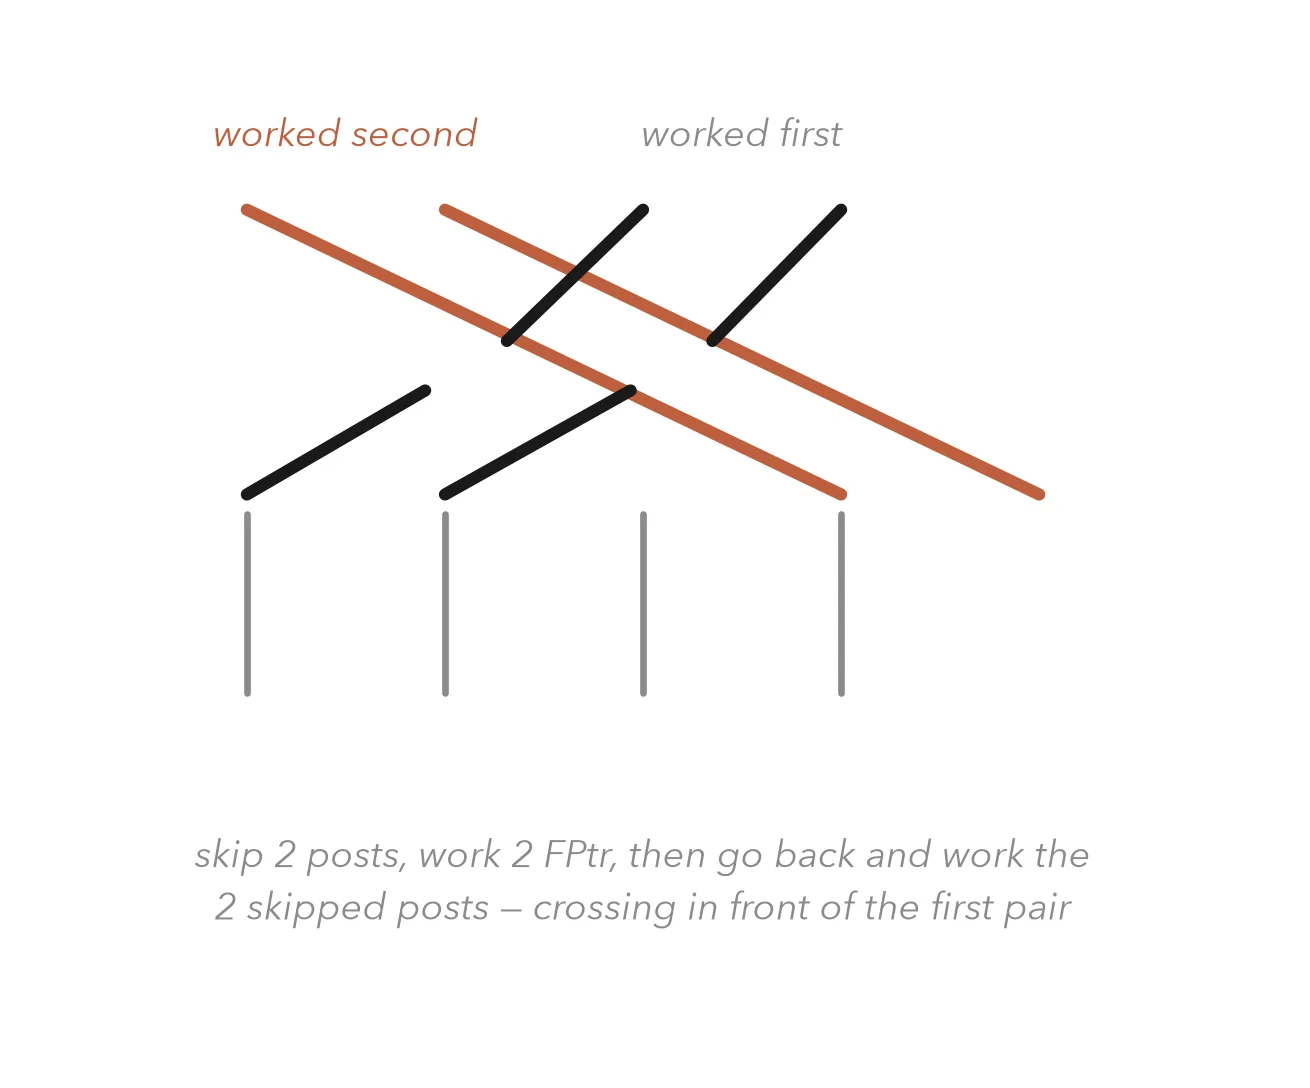
Skip the next 2 stitches. Work FPtr around each of the following 2 posts. Now go back to the 2 you skipped and work FPtr around each of those, passing in front of the two you just made.
You have used four stitch positions and made four stitches, so the count does not change. The two pairs have simply swapped places, and the crossing is the cable.
The fabric will resist you — it wants to lie flat and you are asking it to twist. Work the crossed stitches a little more loosely than usual and give the yarn a gentle tug afterwards to settle them.
The cable panel (6 sts)
The panel sits on the back of the hand and is worked over six stitches: one BPdc, four cable stitches, one BPdc. The two back post stitches recede and frame the cable, which is what makes it stand out.
Plain rounds (three rounds out of every four): BPdc, FPtr in each of the next 4 sts, BPdc.
Cable rounds (every fourth round): BPdc, work the cable cross over the next 4 sts, BPdc.
All remaining stitches in the round are worked in plain hdc.
Instructions
Cuff and hand — make 2 (see mirroring note)
Worked in the round from the cuff upwards, joined at the end of each round. Figures in brackets are for size M/L.
Thumb gusset
A wedge of increases on the palm side, worked while the cable panel continues undisturbed on the back of the hand. Increases happen on alternate rounds only.
Upper hand and top shaping
Thumb
Worked from the held stitches.
Stitch chart
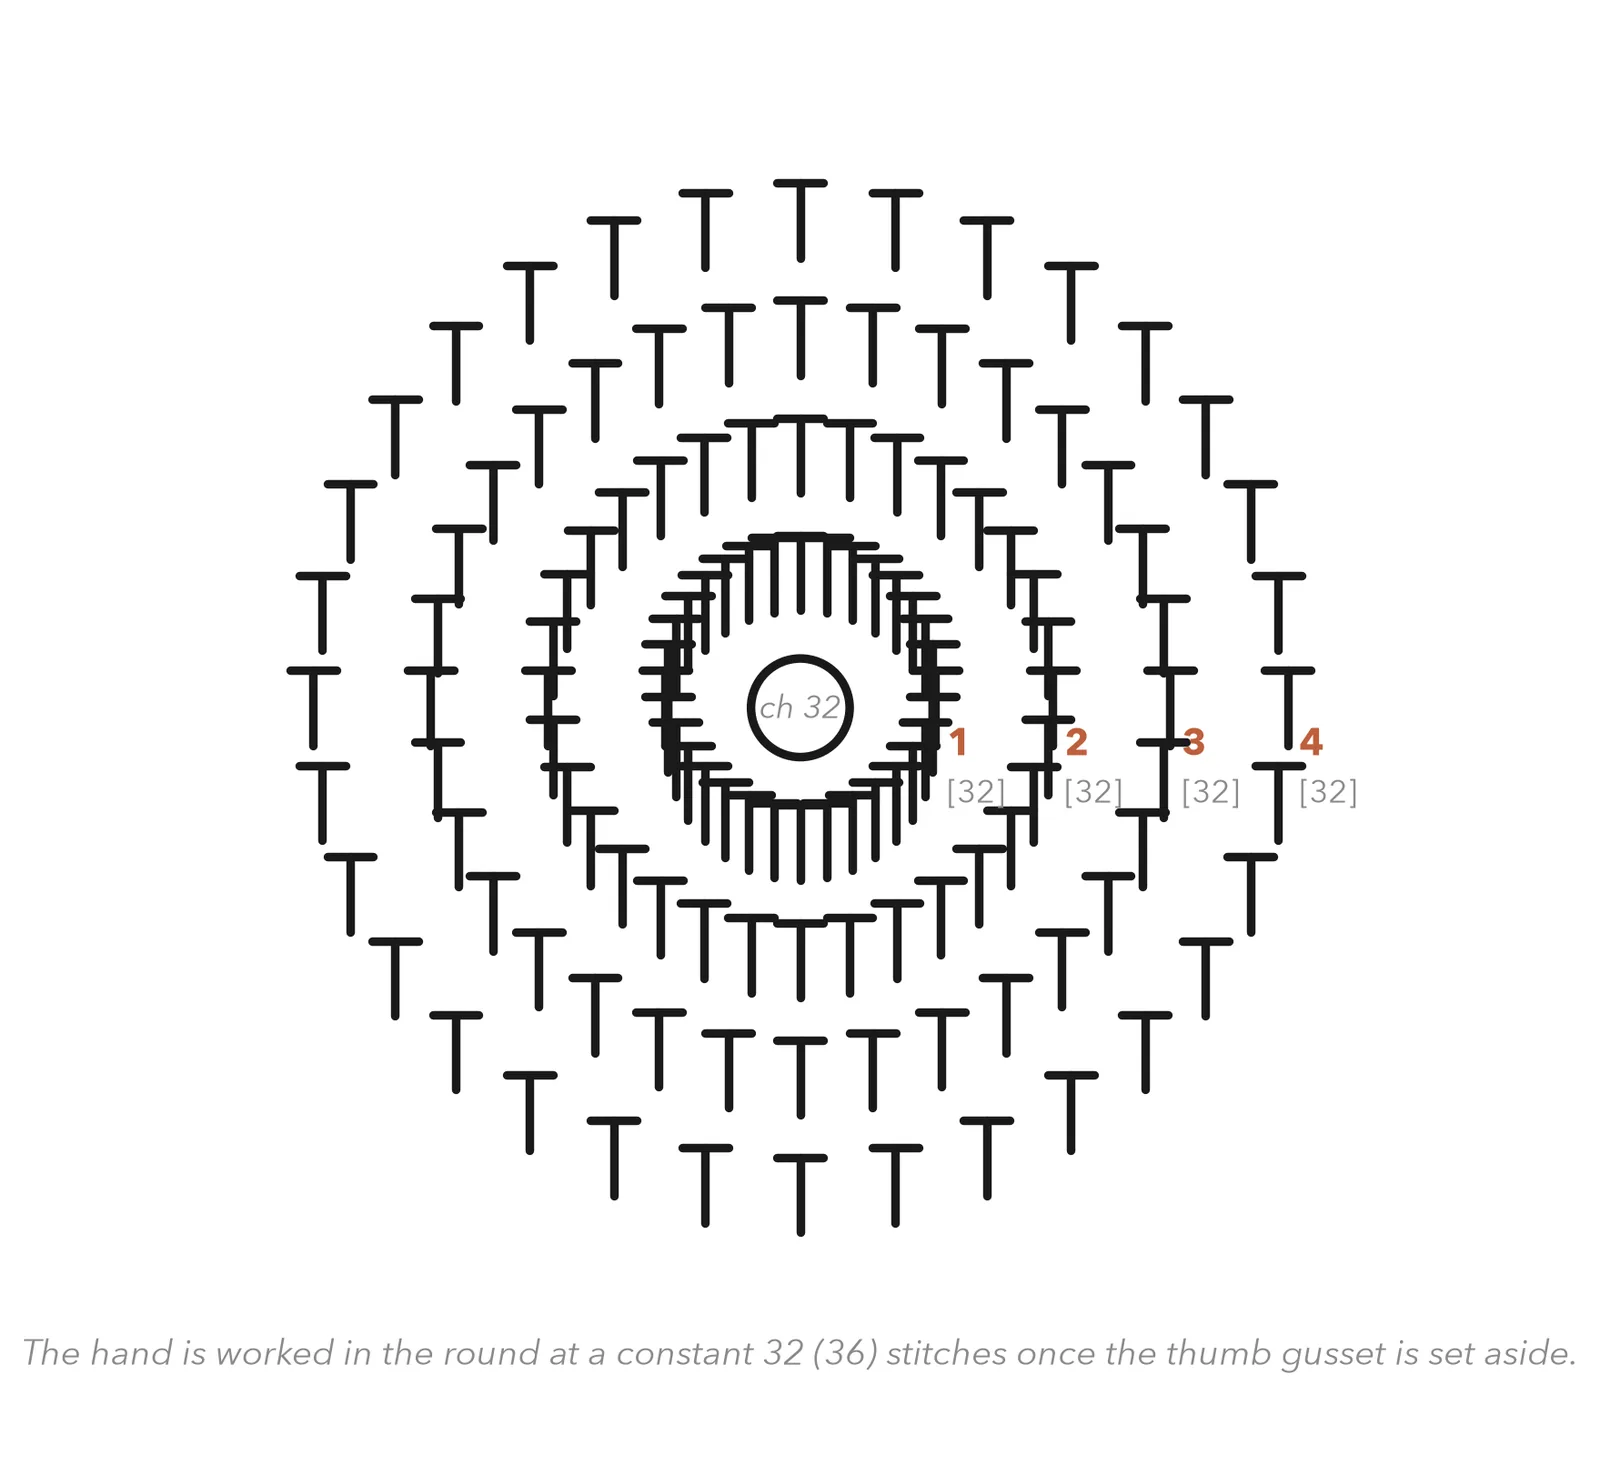
The cable itself is easier to understand from the crossing diagram in the special stitches section than from a round chart, so use the two together: this one for the structure of the hand, that one for what your hook actually does at the cable.
Finishing
Making the second mitten a mirror, not a copy. Everything is identical except the position of the thumb gusset. On the first mitten, place the gusset to one side of the cable panel; on the second, place it the same distance to the other side. Lay the first mitten flat, palm up, and work out where the gusset needs to be on its mirror image before you start Round 12.
Cross the cables the same way on both mittens. A pair with cables twisting in opposite directions looks like a mistake, even though some knitters do it deliberately.
Weave in all ends on the inside, working the thumb tails into the thumb join where the fabric is thickest and most likely to wear.
Block lightly if the cables look uneven: dampen, pat into shape, and dry flat over a rolled towel. Do not stretch — you want the cables to stay raised.
If something has gone wrong
Either the crossing stitches are worked too loosely, or you are not framing the cable with back post stitches. The BPdc on each side is what pushes the cable forward — without them a cable sits flat.
The crossed stitches are too tight. Treble crochet is used here precisely because it has the length to travel sideways; work those four stitches deliberately loosely.
The most common mitten complaint. When you pick up around the ch-2 gap, work an extra stitch into each corner and pull it firm. If the hole has already appeared, close it from the inside with a few stitches of the same yarn — this is normal practice, not cheating.
Write down the round number where you started decreasing on the first mitten. Trying each one on separately produces pairs that do not match, because a hand feels different second time round.
Every mitten maker does this once. The good news is that the only difference is gusset placement, so the mitten is not wasted — keep it, make a matching right, and you have a spare for the one you will inevitably lose.
Caring for your finished piece
Wool: hand wash cool with wool detergent, press the water out in a towel, and dry flat away from heat. Never tumble dry — felting will shrink a mitten to a size no adult hand will enter. Reshape the cables gently while damp. Mittens wear at the thumb and the fingertips; darn small holes early with a length of the same yarn and they will last many winters.
What's next
Pattern 12 of 12
Fitted Raglan Pullover
One left. Pattern 12 is the graduation piece: a top-down raglan sweater, worked in one piece from the neck down, in six sizes with a full grading table. Every skill in this collection meets there — gauge, shaping, working in the round, reading your own measurements and trusting them. If you have made the eleven patterns before it, you already know how to do every individual part of it.