Free weekly pattern · No. 1 · Beginner · Quick Makes
Something Warm
A mug cozy in an hour, and your first button loop
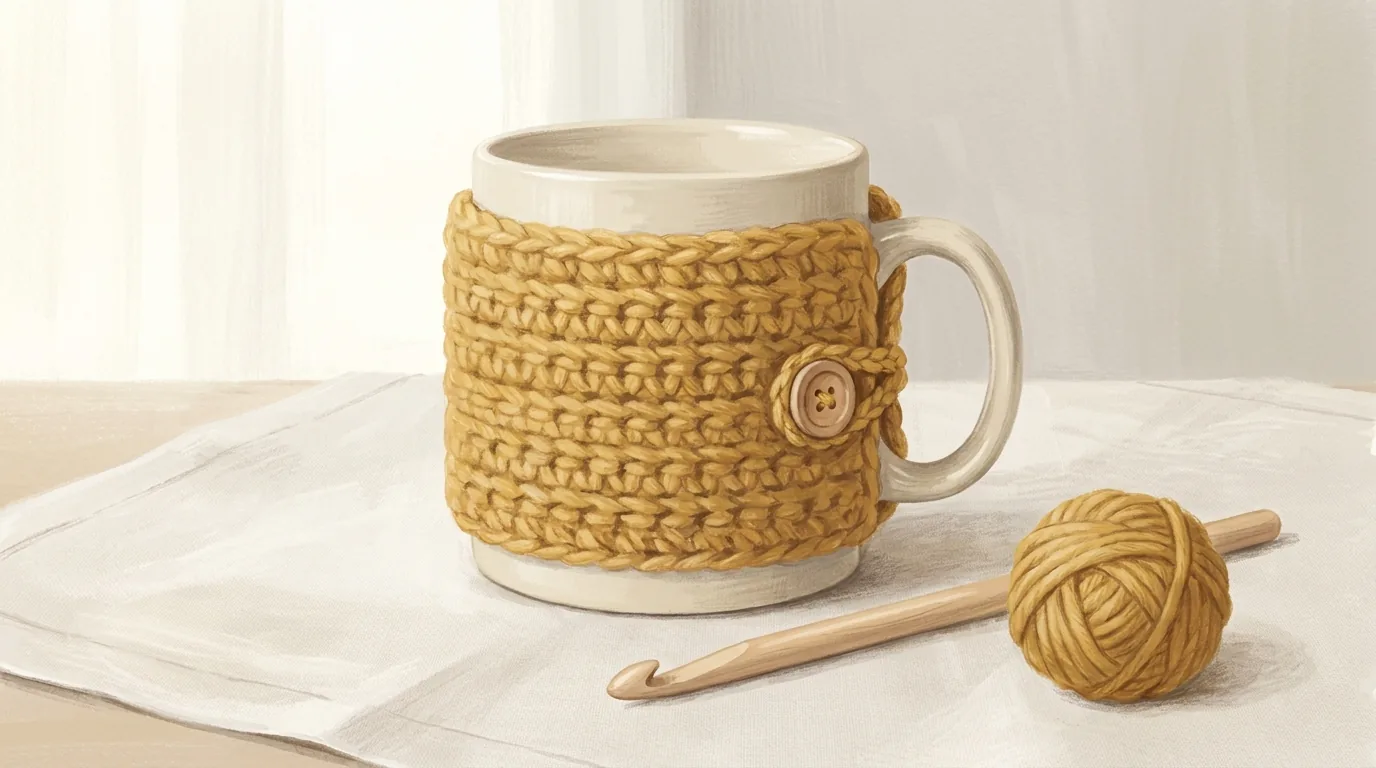
Design illustration. Colours and drape will vary with your yarn — this is a rendering of the design, not a photograph of a finished piece.
About this pattern
The smallest useful thing you can make. Bulky yarn on a big hook means this is finished before a film is, and at the end of it you have something that keeps a cup of tea warm for an extra ten minutes and stops the mug burning your hand.
It is also the gentlest possible introduction to fastenings. A button loop is nothing more than a chain that goes out and comes back to the same stitch — and once you can make one, cardigans, bags and cushion covers all stop looking mysterious.
What this pattern teaches you
- The half double crochet (hdc)
- Working to a measurement rather than a row count
- Making a button loop from a chain
- Sewing a button onto crochet fabric
Skills you'll own by the end
Before you start: You need a slip knot, a chain and the ability to turn at the end of a row. If you have never crocheted at all, make the coaster on our Start Here page first — it takes half an hour and teaches all three.
Materials
| Yarn | Bulky weight (Category 5) wool, acrylic or blend. About 25 m / 27 yd — genuinely a scrap project, and a single 100 g ball will make four or five. Wool holds its shape best, but this is a good place to use up whatever is in the basket. |
| Hook | 6.0 mm (US J-10) |
| Notions | Tapestry needle, scissors, tape measure, and one button about 20 mm across |
Gauge
11 hdc × 8 rows = 10 cm / 4 in in half double crochet
This one has to fit around a mug, and mugs vary more than you would think. Rather than trusting the gauge, wrap the strip around your own mug at the end of Row 1 — the pattern tells you exactly when to check. That takes ten seconds and removes all the guesswork.
Finished measurements
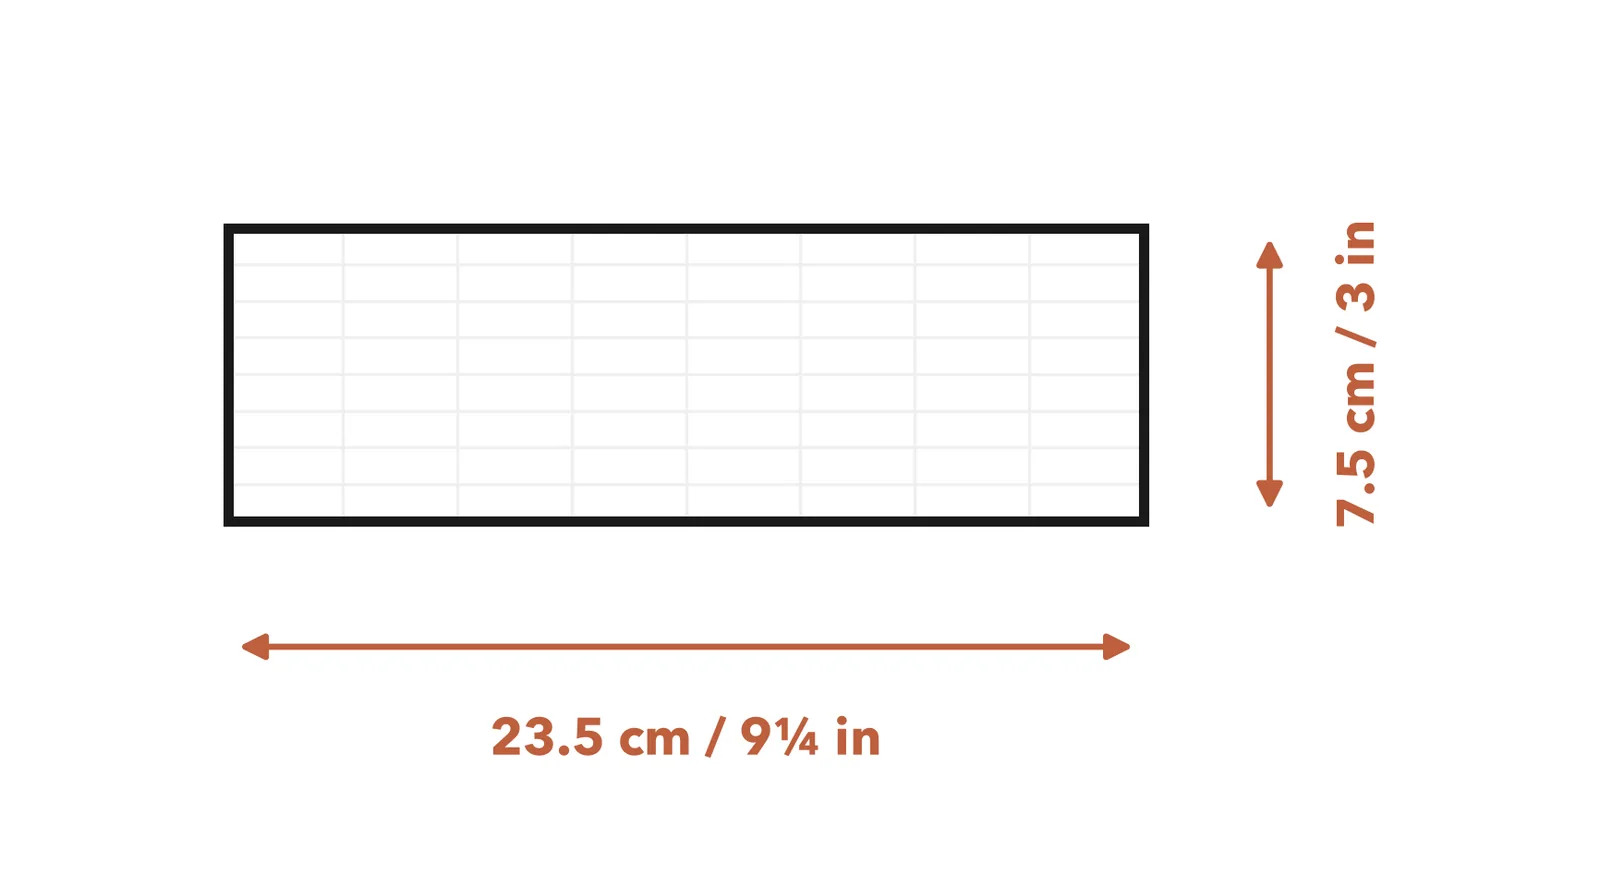
23.5 cm × 7.5 cm (9¼ in × 3 in), before fastening
Abbreviations
This pattern uses US crochet terms.
| ch | chain |
| hdc | half double crochet |
| sl st | slip stitch |
| st(s) | stitch(es) |
| rep | repeat |
| yo | yarn over |
Special stitches
Half double crochet (hdc)
Four movements, and only the first one is new if you already know the single crochet.
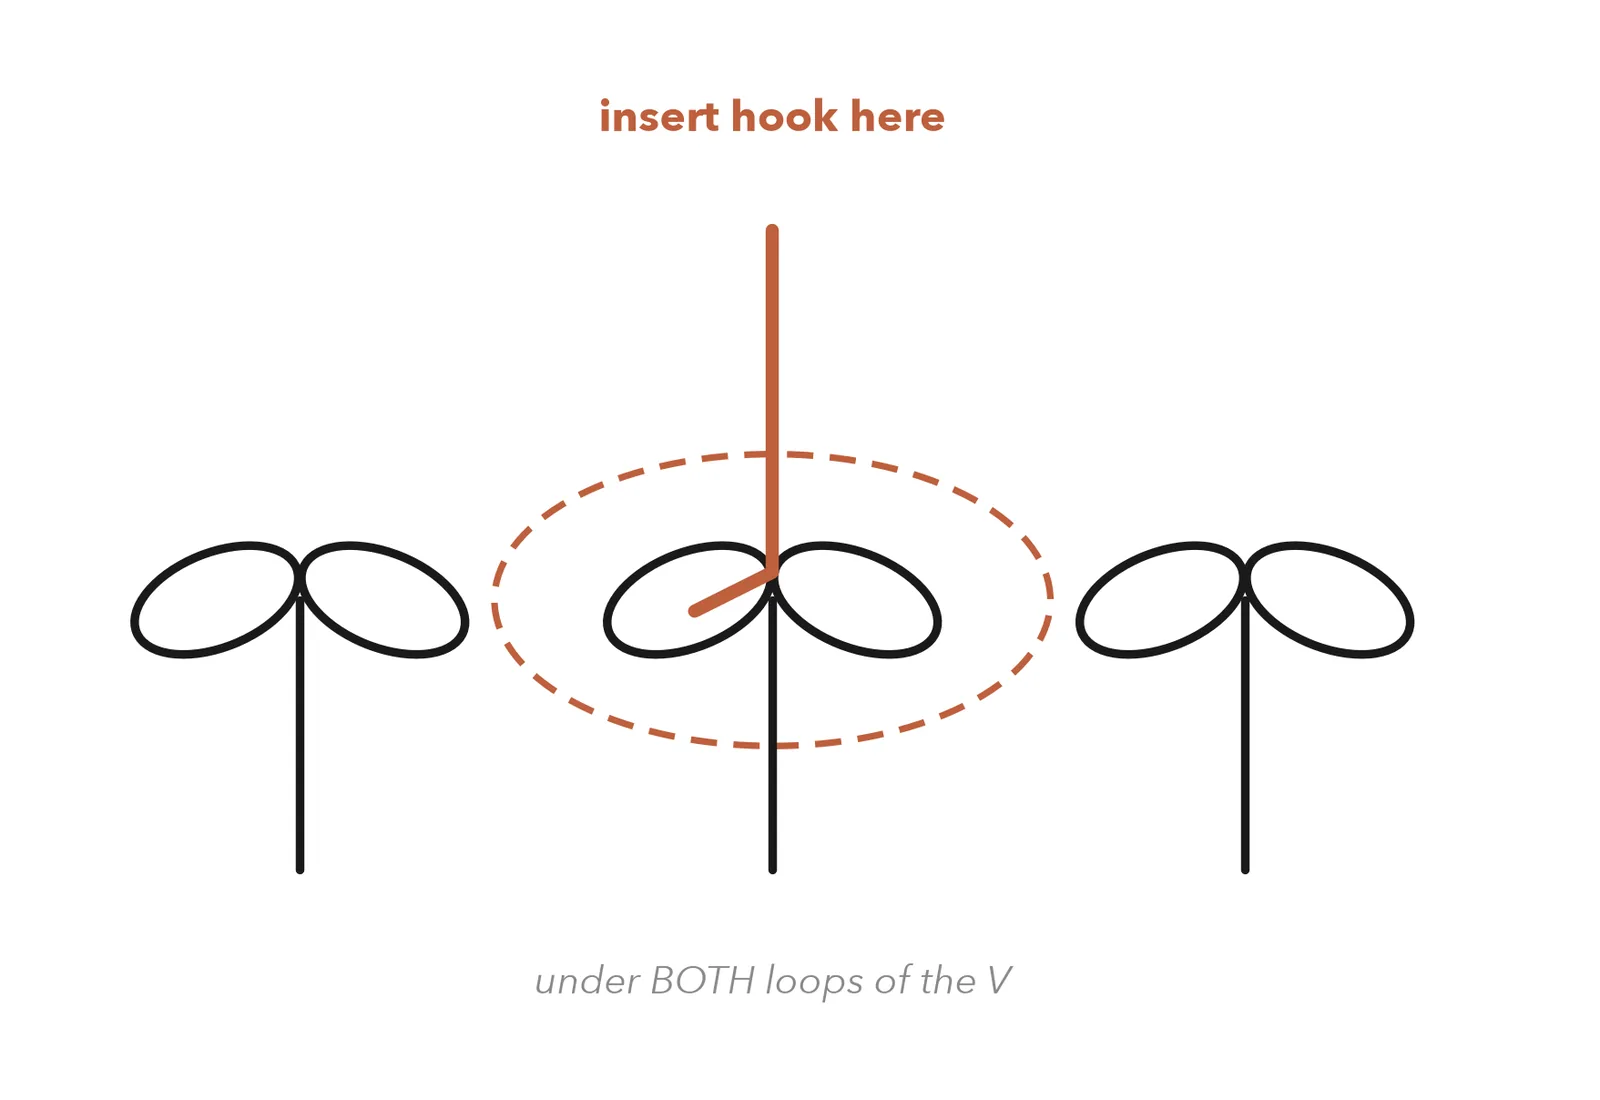
Yarn over first, before the hook goes anywhere. Insert the hook into the next stitch, under both loops of the V on top of it. Yarn over and pull up a loop — three loops on the hook now, which feels strange the first few times and then stops feeling strange. Yarn over and pull through all three at once.
If you forget the first yarn over you have made a single crochet instead, and it will sit visibly shorter than its neighbours. Easy to spot, easy to fix on the next one.
Button loop
A chain that leaves a stitch and comes back to it. At the end of the final row you chain a short length, then slip stitch back into the same stitch you started from — leaving a loop standing proud of the edge.
The length decides the fit. Eight chains suits a 20 mm button; for a bigger button add two chains, for a smaller one take two away. Wrap the chain around your actual button before you close the loop and you will get it right first time.
Instructions
The cozy
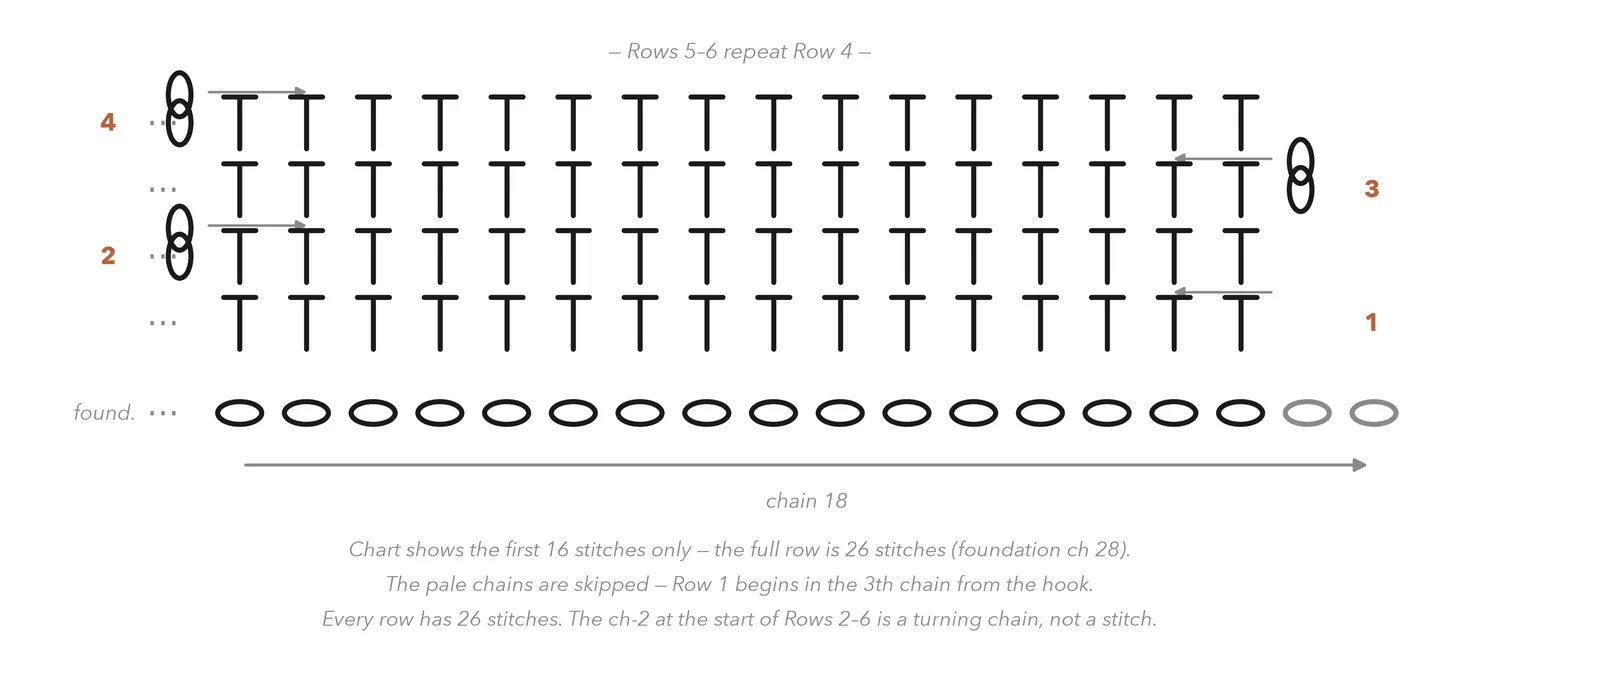
Worked flat in rows, turning at the end of each. The ch 2 at the start of every row is a turning chain and is never worked into.
Stitch chart
A short pattern makes a readable chart, so this is a good one to practise on. Rows are read alternately right to left and left to right, following the arrows — the same direction your hook travels.
Finishing
Weave both tails into the back of the fabric, going through 4–5 stitches and then reversing direction for 2–3 more so they lock. Trim close, leaving a few millimetres.
Sew on the button. Wrap the cozy around the mug and bring the button loop across to the opposite end to see exactly where the button needs to sit — mark it with a pin. Sew the button on at that point using a doubled length of yarn or matching thread, going through several times, and finish with two or three small stitches on the back before fastening off.
No blocking needed. Bulky fabric finds its shape as soon as it is wrapped around something.
If something has gone wrong
Mugs vary a lot. Add chains to the foundation in multiples of two until the strip wraps with a small gap for the handle — there is nothing in this pattern that depends on the exact stitch count.
Undo it back to the last hdc and remake it with two or three more chains. Test it over the button before you close the loop this time.
Those are single crochets — the yarn over before inserting the hook was missed. Say the sequence out loud for a row: yarn over, in, up, through all three.
The last stitch of each row is being skipped. It sits directly above the turning chain and is genuinely hard to see. Count to 26 at the end of every row for the first few rows.
It is a little too long, so it is not gripping. Either fasten the button one loop tighter, or remake it two stitches narrower — a cozy needs to be slightly under the mug's circumference to stay put.
Caring for your finished piece
Wool: hand wash cool and dry flat. Acrylic or blend: machine wash cool, dry flat. Either way, take it off the mug before washing and do not tumble dry — heat flattens bulky texture permanently. Expect to wash it more often than you think; it lives next to tea.
What's next
Pattern 1 of 12
First Loops
If this was your first project, the twelve-pattern collection picks up exactly where you are now and carries on in order — coaster, dishcloth, scarf, and onward to a fitted sweater. Each pattern teaches one new thing on top of the last, so nothing ever arrives without warning.