Pattern 6 of 12 · Intermediate · To Wear
The Everyday Beanie
A flat circle that stops at the right moment
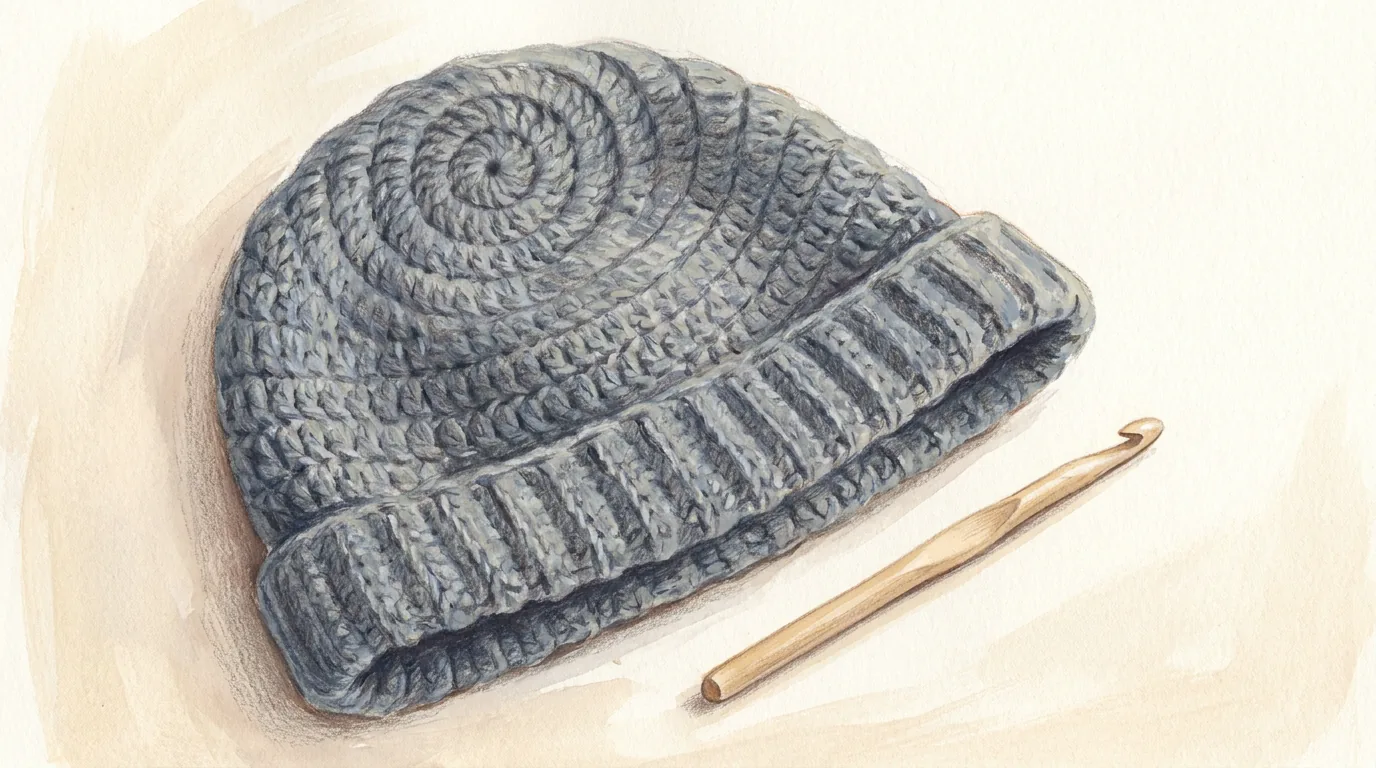
Design illustration. Colours and drape will vary with your yarn — this is a rendering of the design, not a photograph of a finished piece.
About this pattern
A hat is a flat circle that stops growing. You increase until the circle is as wide as the top of a head, then simply stop increasing — and the fabric has nowhere to go but downwards. That single idea is the whole of crown shaping, and once you have it you can make a hat in any yarn, at any gauge, for any head.
This one is worked top-down in continuous rounds, which means no joins and no seam — just a smooth spiral. It finishes with a ridged brim worked in back loops only for grip and stretch, and a single decrease round that snugs the brim so the hat stays put.
What this pattern teaches you
- Working in continuous rounds with a stitch marker
- Increasing evenly to keep a circle flat
- Knowing when to stop increasing — crown shaping
- Decreasing with hdc2tog
- Reading a sizing table and working one size from three
Skills you'll own by the end
Before you start: Patterns 1–5. You need the magic ring and hdc; continuous rounds and decreasing are new here.
Materials
| Yarn | Worsted weight (Category 4) wool or wool blend. Roughly 150 m / 165 yd for the child size, 180 m / 197 yd for adult L — one 100 g ball covers any size. Wool has the memory to keep the brim snug; pure acrylic will stretch out over time. |
| Hook | 5.5 mm (US I-9) |
| Notions | Stitch marker (essential, not optional), tapestry needle, scissors, tape measure |
Gauge
12 hdc × 9 rounds = 10 cm / 4 in worked in the round
This hat has to fit a head, and unlike the ear warmer it cannot be adjusted after the fact. Work a flat swatch in rows, or better, make the first six rounds of the crown and measure the circle across: at Round 6 (48 sts) it should be about 13 cm wide. If it is not, change hook size before you go any further.
Choose your size
Three sizes, following Craft Yarn Council head measurements. Instructions give the child size first, with adult S/M and adult L in brackets: 56 (64, 72).
| Size | Fits head | Body sts | Finished circumference | Height |
|---|---|---|---|---|
| Child | 48–52 cm / 19–20½ in | 56 | 46.5 cm / 18¼ in | 19.5 cm / 7¾ in |
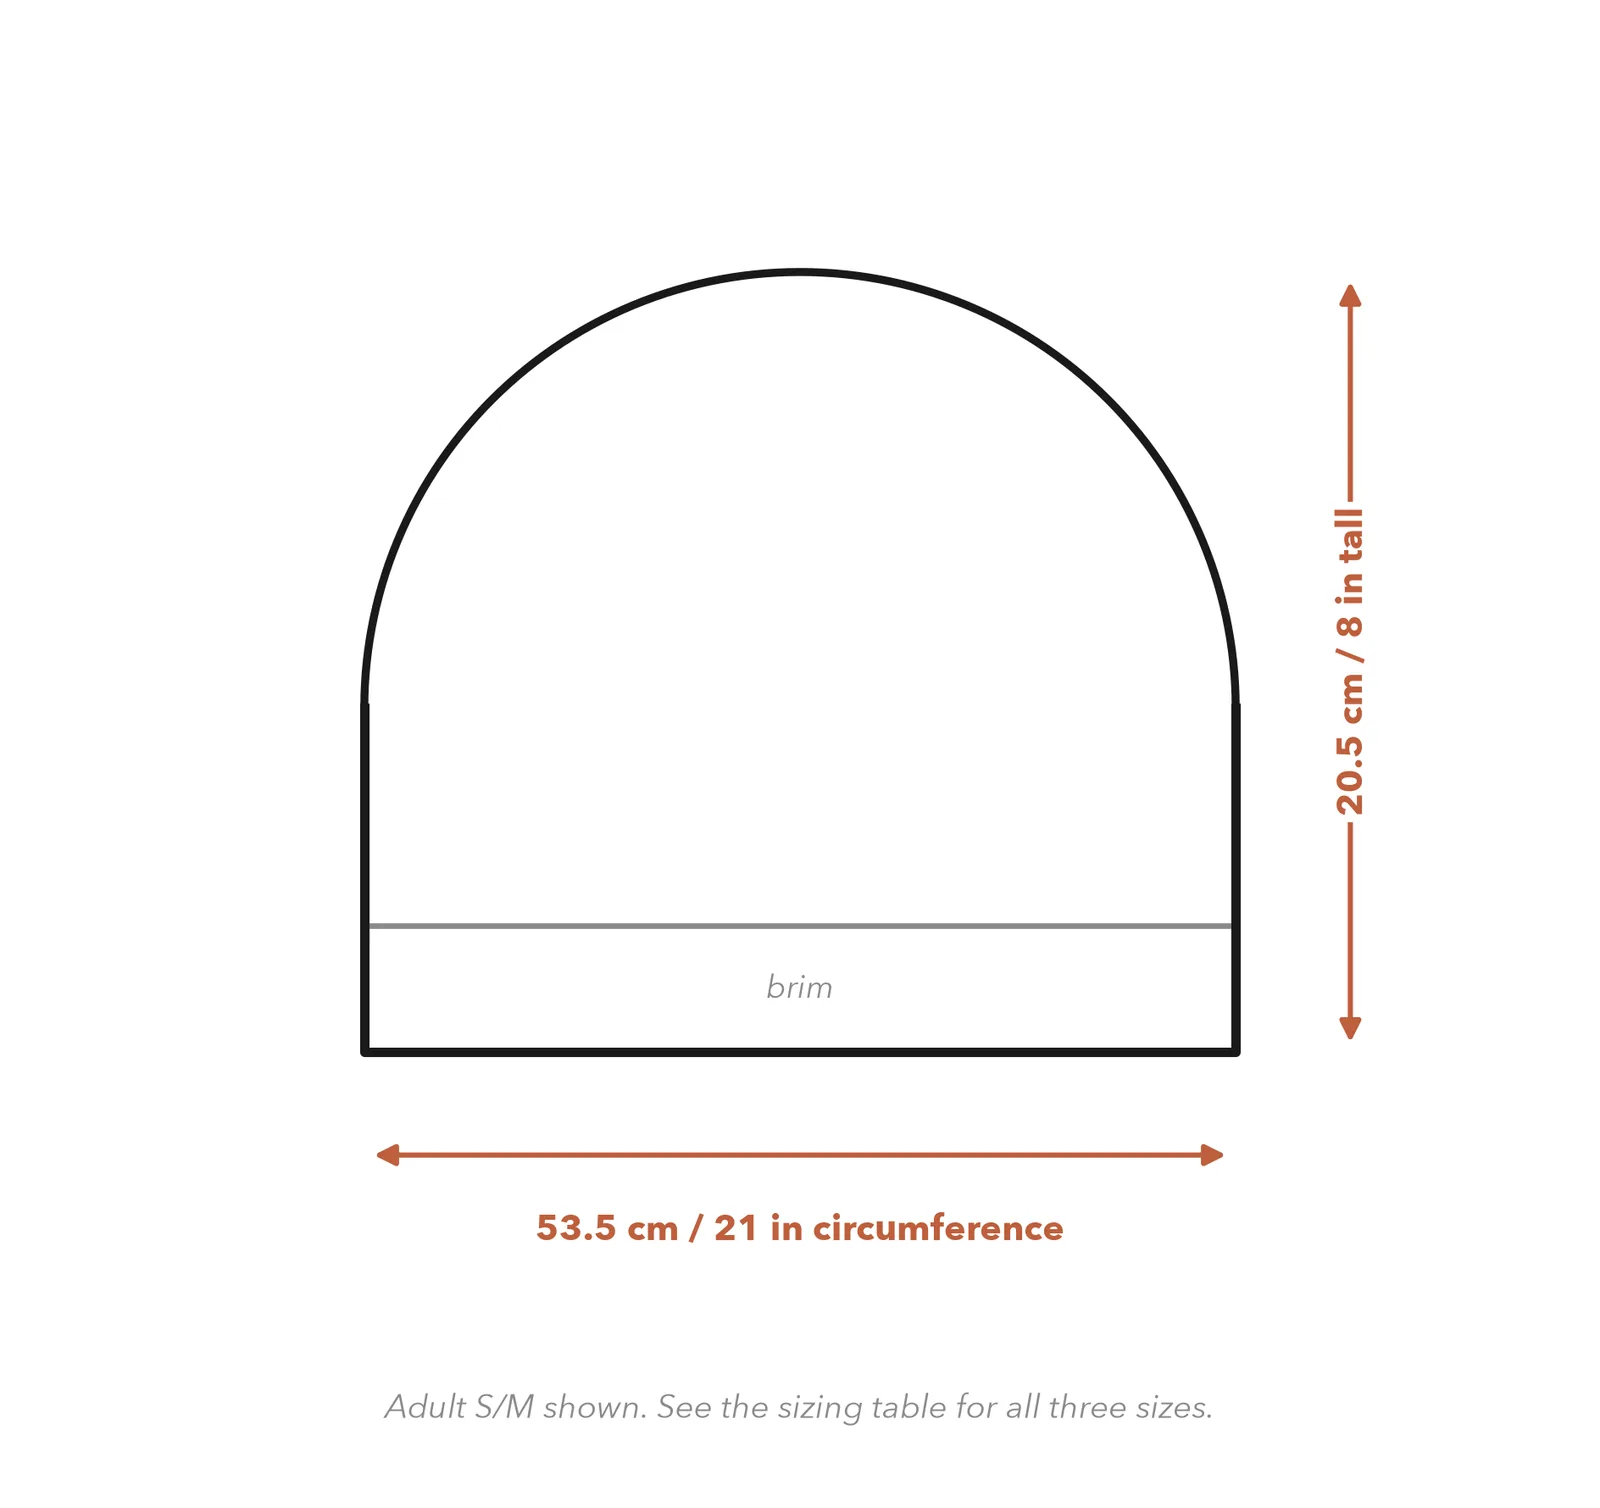
| Adult S/M | 54–58 cm / 21¼–22¾ in | 64 | 53.5 cm / 21 in | 21.5 cm / 8½ in |
| Adult L | 59–62 cm / 23¼–24½ in | 72 | 60 cm / 23½ in | 23 cm / 9 in |
Finished circumference is deliberately smaller than the head it fits. A hat needs negative ease of 2–4 cm to stay on; the fabric stretches to make up the difference.
Finished measurements
Adult S/M: 53.5 cm circumference × 21.5 cm tall (21 in × 8½ in). See the sizing table for all three.
Abbreviations
This pattern uses US crochet terms.
| ch | chain |
| sc | single crochet |
| hdc | half double crochet |
| hdc2tog | half double crochet 2 together (a decrease) |
| inc | increase — 2 hdc in the same stitch |
| dec | decrease |
| sl st | slip stitch |
| BLO | back loop only |
| MR | magic ring |
| st(s) | stitch(es) |
| rnd | round |
| rep | repeat |
Special stitches
Continuous rounds and the stitch marker
In Pattern 5 each round was joined and closed. Here you simply keep going: the last stitch of a round is followed immediately by the first stitch of the next, spiralling upwards. It gives a smooth fabric with no seam line.
The cost is that there is nothing to tell you where a round begins. Put a stitch marker in the first stitch of every round and move it up as you start each new one. Without it you will lose your place, and with a hat that means a crown that goes lopsided.
Increase (inc) and decrease (hdc2tog)
An increase is simply two stitches worked into one stitch of the round below. That is all — it adds one to your count.
A decrease joins two stitches into one. For hdc2tog: yarn over, insert the hook in the next stitch and pull up a loop; yarn over, insert the hook in the following stitch and pull up a loop — five loops on the hook — then yarn over and pull through all five. It removes one from your count.
There is exactly one decrease round in this pattern, at the brim, and its job is to pull the opening in slightly so the hat grips.
Instructions
The crown
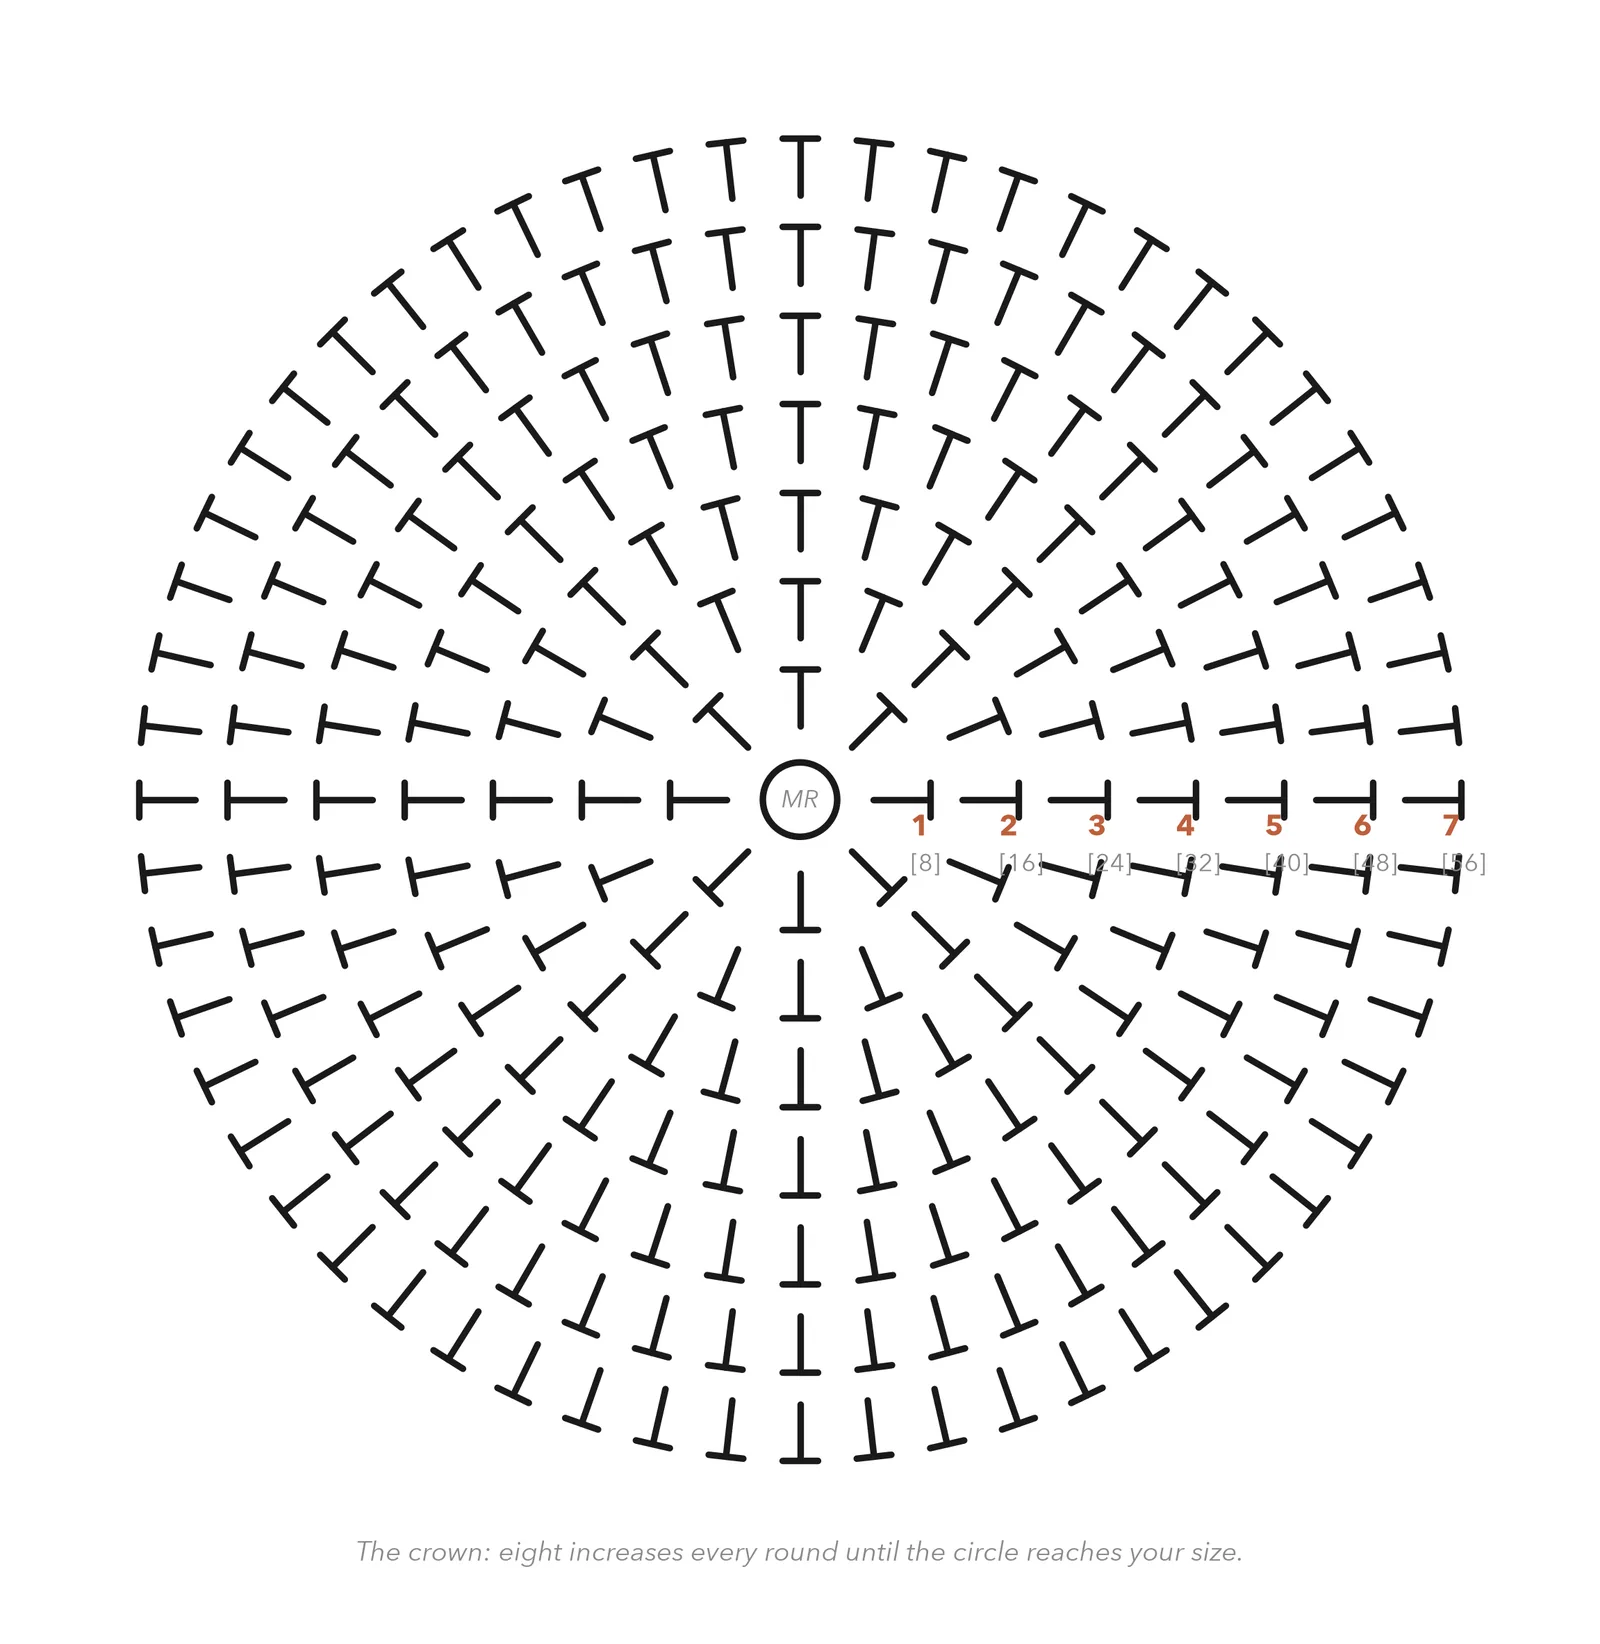
Worked in continuous rounds from the top of the head downwards. Eight increases per round keeps the circle flat — half double crochet needs eight, not the six a single crochet circle uses, or the crown will ruffle. Move your marker at the start of every round.
The body
No more increases. The fabric now turns downwards on its own and forms the sides of the hat.
The brim
One decrease round to snug the opening, then four rounds in back loops only, which gives the brim its ridges, its grip and its stretch.
Stitch chart
Read this chart from the centre outwards, the same way you worked it. You can see the eight increase points radiating out like spokes — that even spacing is the whole trick. Bunch the increases together and you get a hexagon instead of a circle.
Finishing
Weave in both tails on the inside. The tail at the crown should be worked around the magic ring a couple of times before weaving, so the centre can never open up.
No blocking needed. If the hat feels slightly small, wear it — wool relaxes to the head within an hour and settles at its true size.
If you want a pom-pom, make or buy one and sew it to the crown through the magic ring centre, which is the strongest point on the whole hat.
If something has gone wrong
Too many increases for the stitch height. Check you are working eight per round and not more, and that you have not accidentally continued increasing past your size's final round. A ruffled crown cannot be blocked out — it must be unpicked.
Too few increases, or your tension is tight. A little cupping at Round 8 is fine and even desirable — it is becoming a hat. Serious cupping by Round 5 means you have missed increases.
This is what the stitch marker is for, and it is why it is listed as essential. If you have lost your place, count backwards from the working stitch to find your last increase, and re-place the marker. Then move it every single round.
Add more rounds in the body section before the brim. The round counts given are for average head depth, and heads vary far more in depth than in circumference.
Work a second decrease round before the back-loop rounds, using [hdc in next 11 (13, 15) sts, hdc2tog] rep 4 times. This is also worth doing if you are using acrylic, which has less memory than wool.
Caring for your finished piece
Wool: hand wash cool, squeeze out the water in a towel, and dry flat — stuffing the crown with a rolled towel keeps its shape. Never tumble dry wool; it will felt and shrink permanently. Acrylic or blend: machine wash cool, dry flat.
What's next
Pattern 7 of 12
Market Tote Bag
Pattern 7 keeps you in the round but changes the shape: an oval base instead of a circle, which is how every bag, slipper and sole is built. It also introduces openwork — a mesh of chain spaces that makes a fabric which is mostly holes, stretches to fit a week's shopping, and works up startlingly fast.