Pattern 10 of 12 · Advanced · To Wear
Open Air
A triangle shawl, and the day charts start to make sense
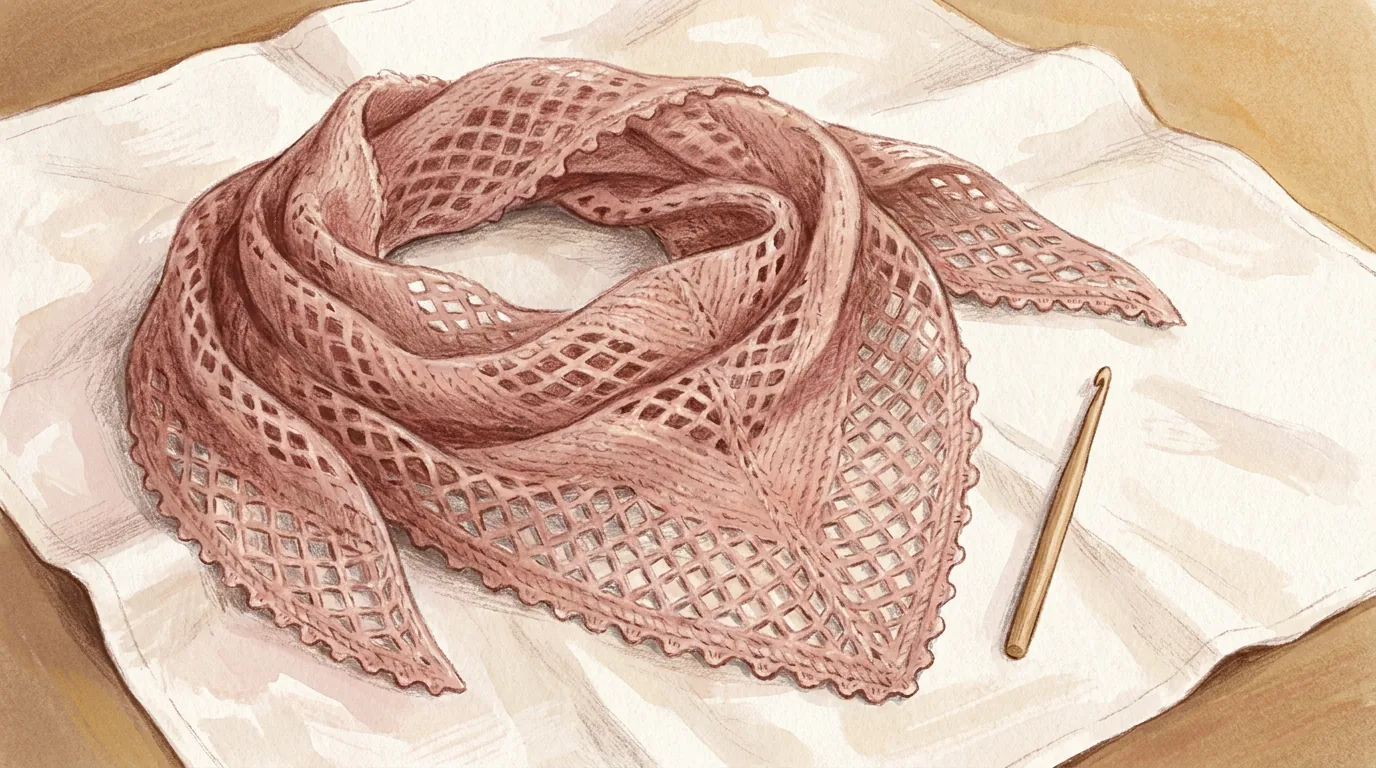
Design illustration. Colours and drape will vary with your yarn — this is a rendering of the design, not a photograph of a finished piece.
About this pattern
A lace shawl is mostly holes, and the holes are the design. Worked downwards from a handful of stitches at the back of the neck, it grows by four spaces every row until it is wide enough to wrap around you.
This is also where charts stop being a nice extra. Written out, a row of this shawl is a long paragraph of instructions that all say much the same thing. Drawn as a chart it is a single picture you can read at a glance — and after two or three rows you will stop reading anything at all and simply follow the fabric.
What this pattern teaches you
- Reading a stitch chart as the primary instruction
- Treble crochet (tr)
- Lace repeats and how a shawl grows
- Working a picot edging
- Blocking lace open — the step that makes the shawl
Skills you'll own by the end
Before you start: Patterns 1–9. You need to be comfortable working into chain spaces, which you learned on the tote in Pattern 7.
Materials
| Yarn | Fingering weight (Category 1–2) — merino, a merino/silk blend, or sock yarn. Roughly 500 m / 550 yd, which is one generous 100 g skein. A yarn with some drape matters far more than fibre content; a stiff cotton will not hang properly no matter how well you block it. |
| Hook | 4.0 mm (US G-6) — much larger than the yarn label suggests, which is what makes the lace open |
| Notions | Tapestry needle, scissors, tape measure |
| For blocking | Blocking mats or a clean towel on a spare bed, and rustproof pins or blocking wires. This is not optional equipment for this pattern. |
Gauge
5 ch-3 spaces × 5 rows = 10 cm / 4 in, measured after blocking
Gauge in lace only means anything once the piece is blocked — unblocked lace measures perhaps two-thirds of its final size and looks nothing like the finished item. Make a small swatch, wet it, pin it out, let it dry and then measure. It feels like a lot of effort for a swatch, and it is the only way to know what you are making.
Finished measurements
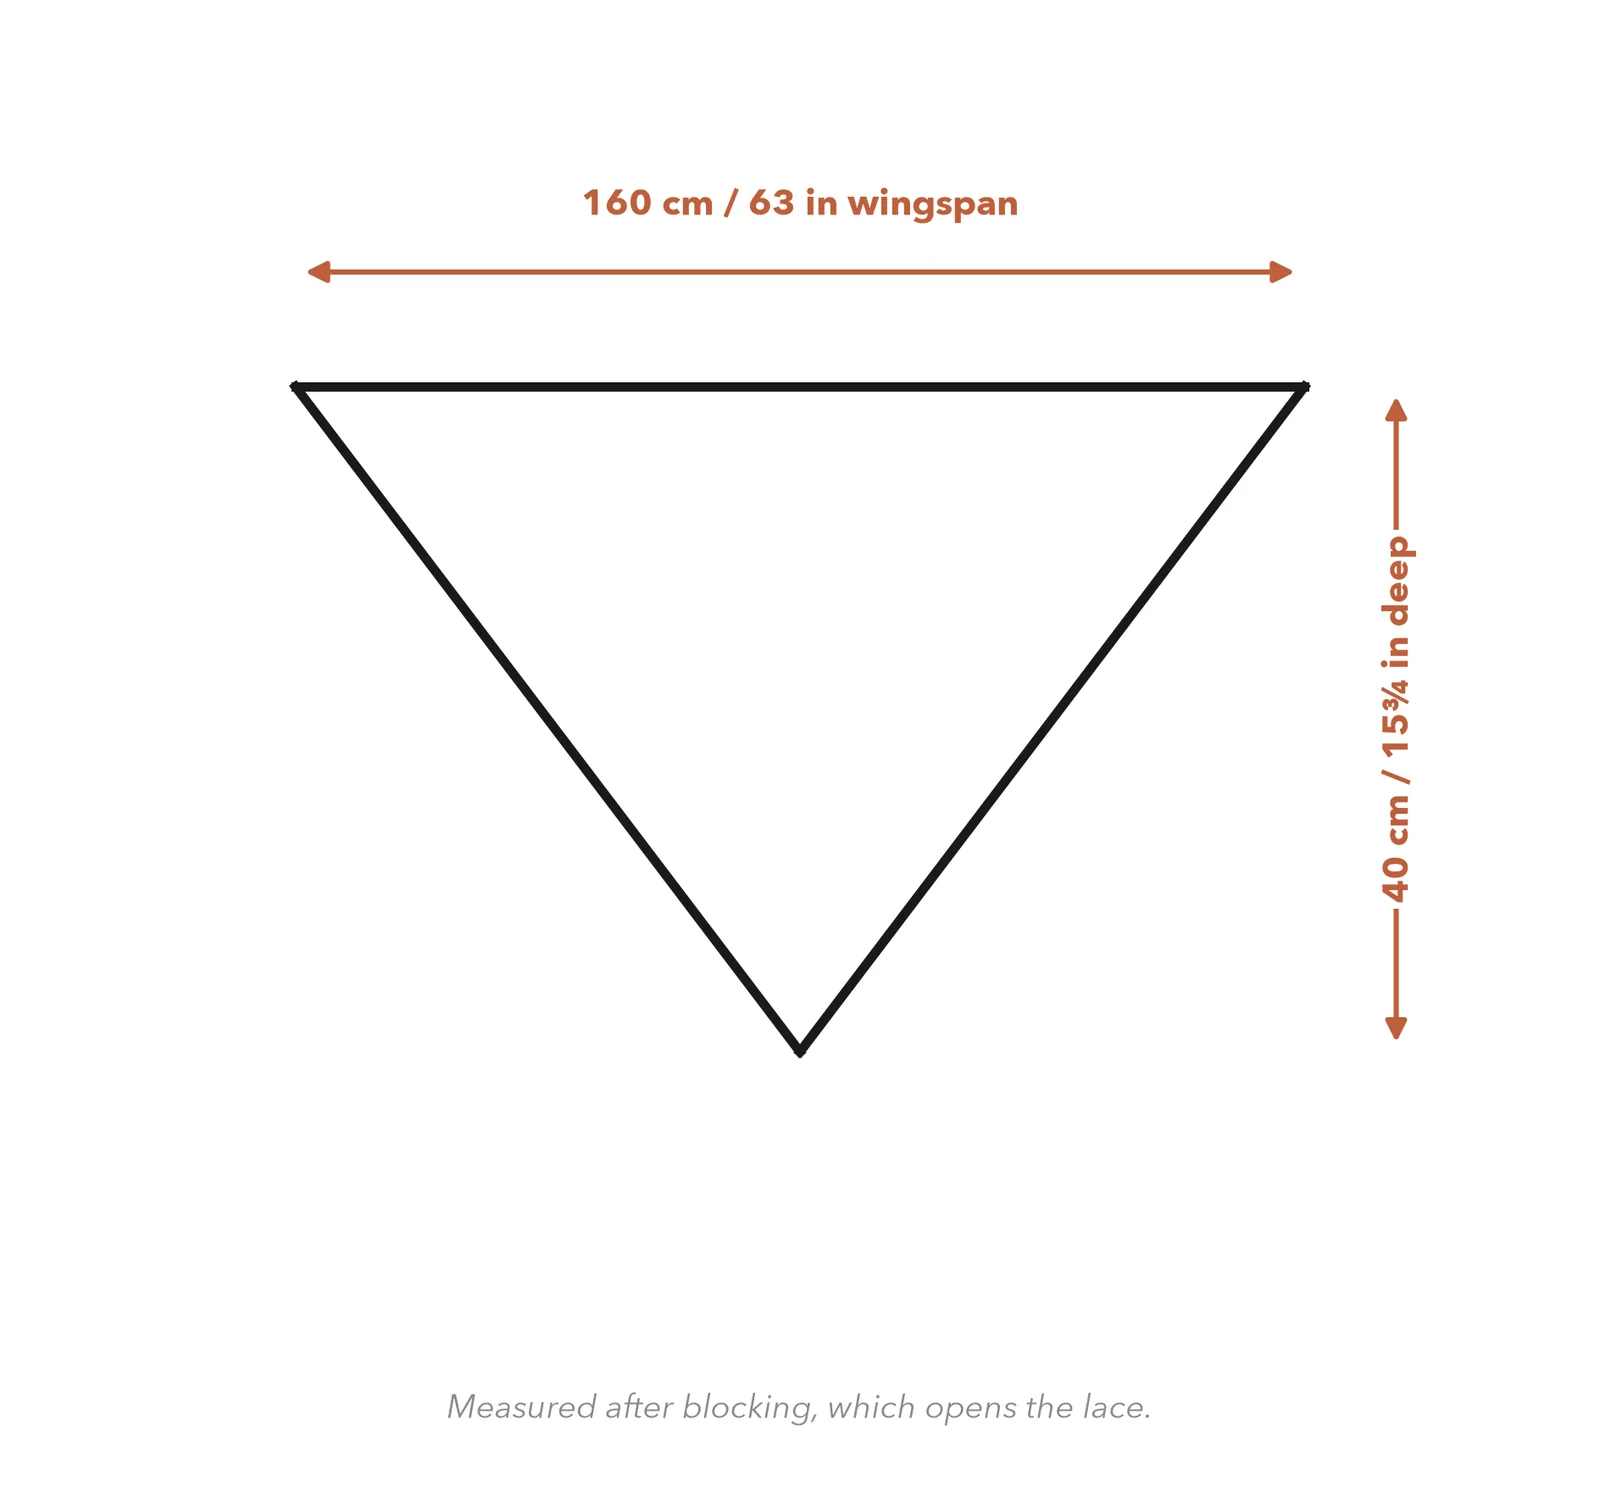
160 cm wingspan × 40 cm deep (63 in × 15¾ in), after blocking
Abbreviations
This pattern uses US crochet terms.
| ch | chain |
| sc | single crochet |
| dc | double crochet |
| tr | treble crochet |
| sl st | slip stitch |
| sp(s) | space(s) |
| st(s) | stitch(es) |
| rep | repeat |
| RS | right side |
Special stitches
Treble crochet (tr)
One step taller again than the double crochet. Yarn over twice, insert the hook into the stitch or space and pull up a loop — four loops on the hook. Then yarn over and pull through two, three times in a row.
The pattern is now clear: each extra yarn over at the start adds one more height to the stitch and one more pull-through-two at the end. Single crochet has none, half double and double have one, treble has two.
Tall stitches are what make lace airy. A treble spans twice the vertical distance of a single crochet using the same amount of yarn, so the fabric is mostly space.
Picot
A tiny decorative bobble on an edge. Ch 3, then slip stitch into the third chain from the hook — which is the same chain you would normally count back to — pulling it into a small ring.
Picots along the lower edges of a shawl do real work as well as decorative work: they give the blocking pins something to grip, which is how a shawl gets its scalloped edge.
How this shawl grows
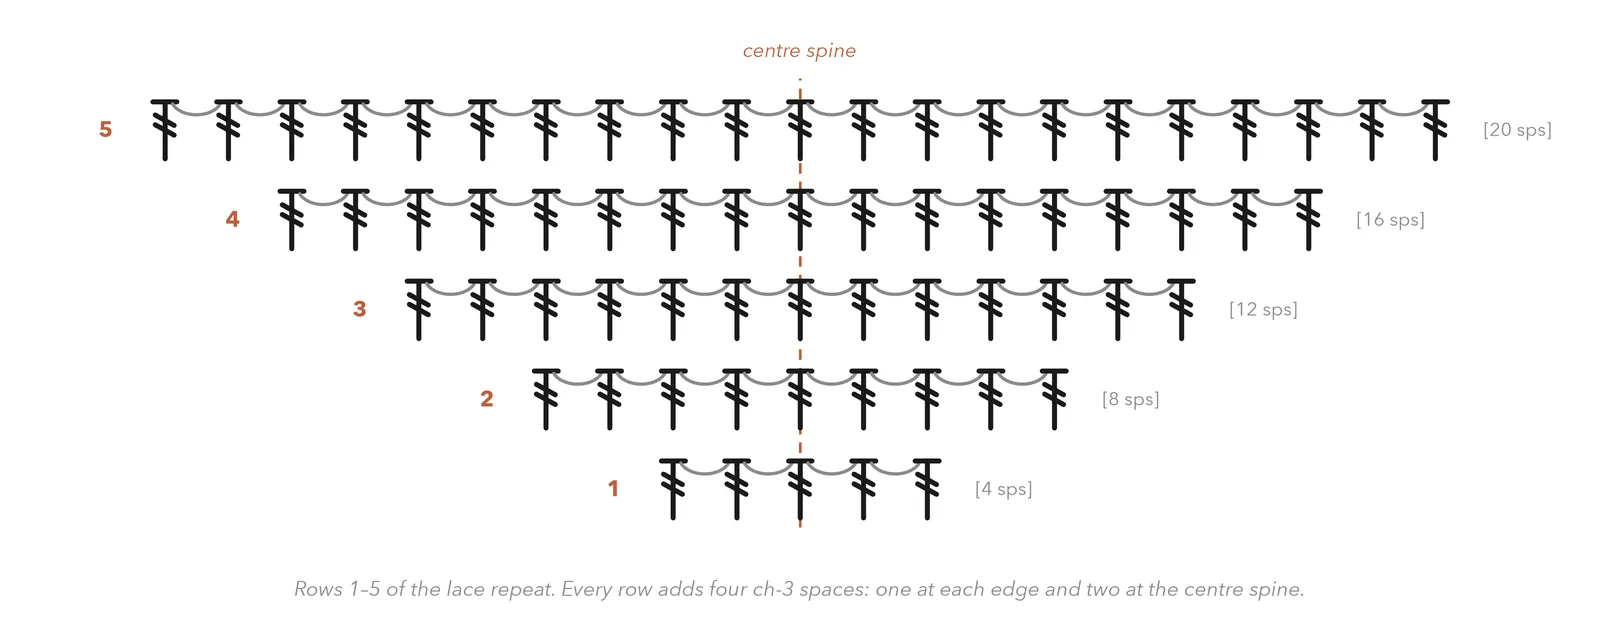
Four new chain spaces every row. One is added at the beginning of the row by the turning chain, one at the end by working two trebles into the last space, and two in the middle at the centre spine.
Mark the centre spine space on Row 1 and move the marker up as you go. Everything in this pattern is symmetric around it, and if you lose it the shawl will start growing lopsided in a way that is very hard to see until it is several rows too late.
Instructions
The shawl
Worked from the centre back of the neck downwards, turning at the end of every row. Counts are ch-3 spaces, not stitches. Every row follows the same structure, so once Row 2 makes sense you have the whole pattern.
Picot edging
Worked along the two lower edges of the triangle, which are the ones that will hang down.
Stitch chart
This chart is the pattern. The written instructions above say exactly the same thing at much greater length, and after a couple of rows most people abandon them. Read each row from the outside edge in toward the spine, then out to the other edge. Every tall post is a treble; every arc between two posts is a ch-3 space. The rows above Row 5 continue the identical structure, simply wider.
Finishing
Weave in the two ends. Work them along a treble post rather than across a chain space, where they would show against the light.
Now block, and block properly — this is the step that makes the shawl. Soak the finished piece in cool water for twenty minutes until it is completely saturated. Lift it out supporting its whole weight, press the water out between towels, and never wring it.
Lay it on your blocking mats and pin the long top edge out straight to its full 160 cm first. Then pull the centre point down to 40 cm and pin it. Work outwards from there, pinning each picot along both lower edges — this is what creates the scalloped edge, and it is worth the hour it takes.
Stretch it further than feels reasonable. Lace is designed to be opened under tension, and a timidly blocked shawl stays crumpled. Leave it pinned until it is bone dry, at least a full day.
Unpin and try it on. The transformation from what came off the hook is the single most satisfying moment in this collection.
If something has gone wrong
The spine increase is drifting. Count the spaces on each side of your marked centre space: they must be equal. If they are not, unpick to the last row where they were and re-mark.
Count the total spaces in your last row, subtract one, and halve it — that gives the number of spaces on each side. Count in from one edge and the next space is your spine. Re-mark it immediately.
Row n should have 4n + 1 spaces. If you are one or two short, you have missed an edge increase — most often the final (tr, ch 3, tr) in the last space, which is easy to work as a single tr by mistake. Being a few spaces off is survivable in a shawl; simply note your actual count and keep adding four per row from there.
It is unblocked. Lace grows by roughly a third to a half when blocked. Do not add rows to compensate before you have blocked a swatch — you will end up with an enormous shawl and no yarn left.
Some fibres, particularly superwash merino and silk blends, relax over time. This is a property of the yarn rather than a fault in the work. Re-blocking restores it, and takes about an hour.
Caring for your finished piece
Hand wash cool with a wool-safe detergent, press the water out in a towel, and re-block every time — a lace shawl is washed and blocked as one operation, not two. Never tumble dry and never hang it wet; the weight of the water will stretch the lace permanently. Stored folded loosely in a drawer, a well-made lace shawl outlives its maker.
What's next
Pattern 11 of 12
Cabled Mittens
Pattern 11 brings back the post stitches from the cushion and puts them to a harder use: crossing them over each other to make cables that travel up the back of the hand. It also asks you to work in rounds small enough to be awkward, shape a thumb gusset, and make a matching pair — which is its own discipline, because the second mitten has to be the mirror image of the first, not a copy of it.