Pattern 12 of 12 · Advanced · To Wear
The Graduation Sweater
Top-down raglan, six sizes, one piece
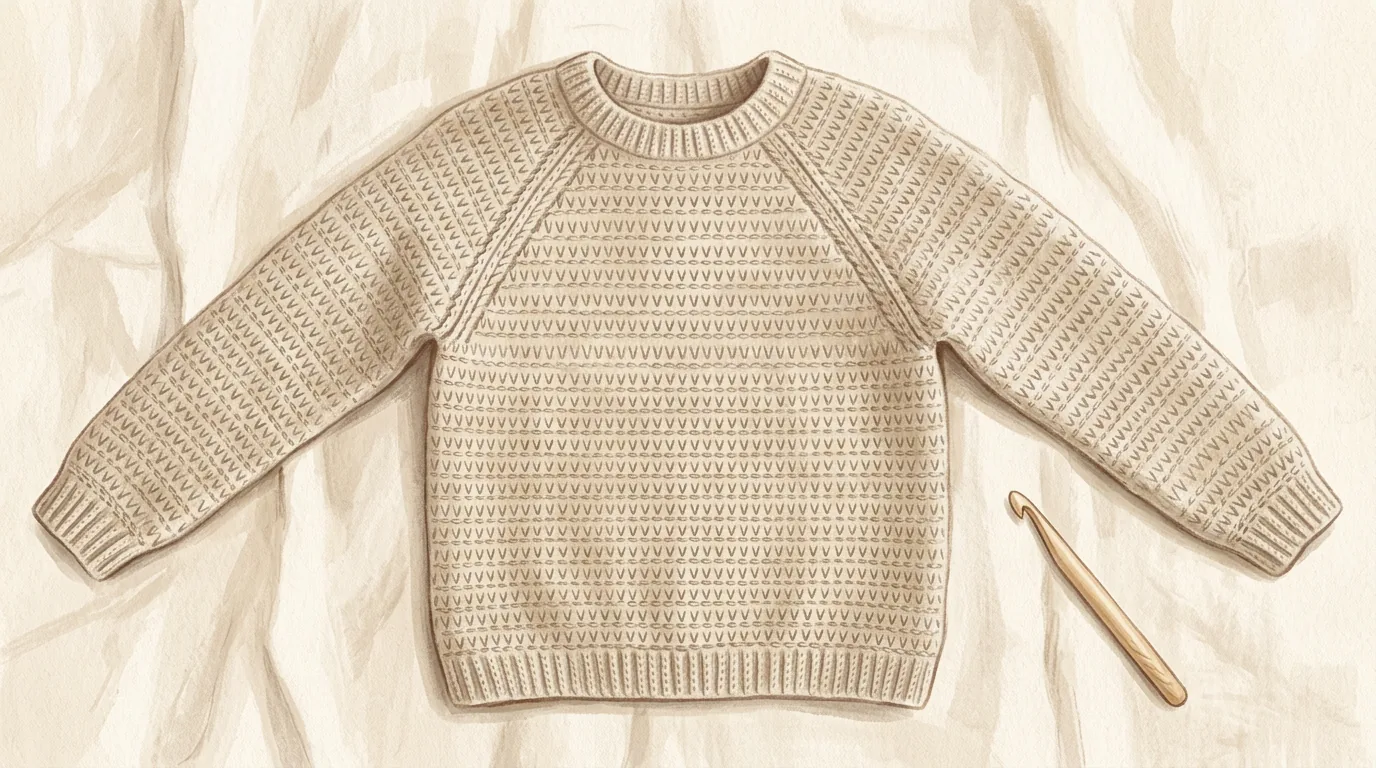
Design illustration. Colours and drape will vary with your yarn — this is a rendering of the design, not a photograph of a finished piece.
About this pattern
This is the last pattern, and it is a whole garment made in one piece. You begin with a circle of stitches at the neck and increase at four points — the raglan lines — until the circle is wide enough to be a chest and two arms. Then you separate them and work down.
Nothing in here is a harder stitch than the beanie used. What is harder is that it has to fit a person, which means gauge stops being a habit you were told to keep and becomes the thing the whole project rests on. Take the swatch seriously, try the sweater on constantly, and trust the tape measure over the row counts. Every number in this pattern is a starting point; your body is the authority.
What this pattern teaches you
- Top-down raglan construction
- Swatching for fit, and adjusting when your gauge differs
- Trying a garment on as you work
- Separating body from sleeves
- Sleeve shaping with evenly spaced decreases
- Neckline and hem finishing
Skills you'll own by the end
Before you start: All eleven previous patterns. In particular you need continuous rounds and shaping from Pattern 6, and the confidence to modify a pattern that Patterns 10 and 11 should have given you.
Materials
| Yarn | DK weight (Category 3) wool or wool blend. Approximately 900 (1000, 1100, 1250, 1400, 1550) m — that is roughly 985 (1095, 1205, 1370, 1530, 1695) yd. Buy one more skein than you think you need and buy it all at once in the same dye lot; running out at the second sleeve is the classic sweater disaster. |
| Hook | 5.0 mm (US H-8), or whatever hook gives you the gauge below |
| Notions | Eight stitch markers, tapestry needle, scissors, tape measure, and scrap yarn for holding the sleeve stitches |
Gauge
15 hdc × 12 rounds = 10 cm / 4 in worked in the round
On a coaster a gauge error is invisible. Here, being one stitch per 10 cm out across a 160-stitch round makes the finished sweater a full size wrong. Work a swatch at least 15 cm square, in the round if you can, wash and dry it the way you will wash the sweater, and only then measure the middle of it. If you cannot match both stitch and row gauge, match the stitch gauge — length is easy to adjust as you go, and width is not.
Choose your size
Six sizes, following Craft Yarn Council women's measurements. Instructions give XS first, then S, M, L, XL and 2XL in brackets: for example 64 (68, 72, 76, 80, 84) sts. Choose by your actual bust measurement, not by the size on your clothes.
| Size | To fit bust | Finished bust | Ease | Body sts | Sleeve sts |
|---|---|---|---|---|---|
| XS | 71–76 cm / 28–30 in | 85 cm / 33½ in | 9–14 cm | 128 | 52 |
| S | 81–86 cm / 32–34 in | 96 cm / 37¾ in | 10–15 cm | 144 | 58 |
| M | 91–97 cm / 36–38 in | 107 cm / 42 in | 10–16 cm | 160 | 64 |
| L | 102–107 cm / 40–42 in | 117 cm / 46 in | 10–15 cm | 176 | 70 |
| XL | 112–117 cm / 44–46 in | 128 cm / 50½ in | 11–16 cm | 192 | 76 |
| 2XL | 122–127 cm / 48–50 in | 139 cm / 54¾ in | 12–17 cm | 208 | 82 |
This sweater is designed with 10–15 cm of positive ease, giving a relaxed everyday fit. For a closer fit choose the size below; for an oversized look choose the size above. Ease is a style decision, not a mistake.
Finished measurements
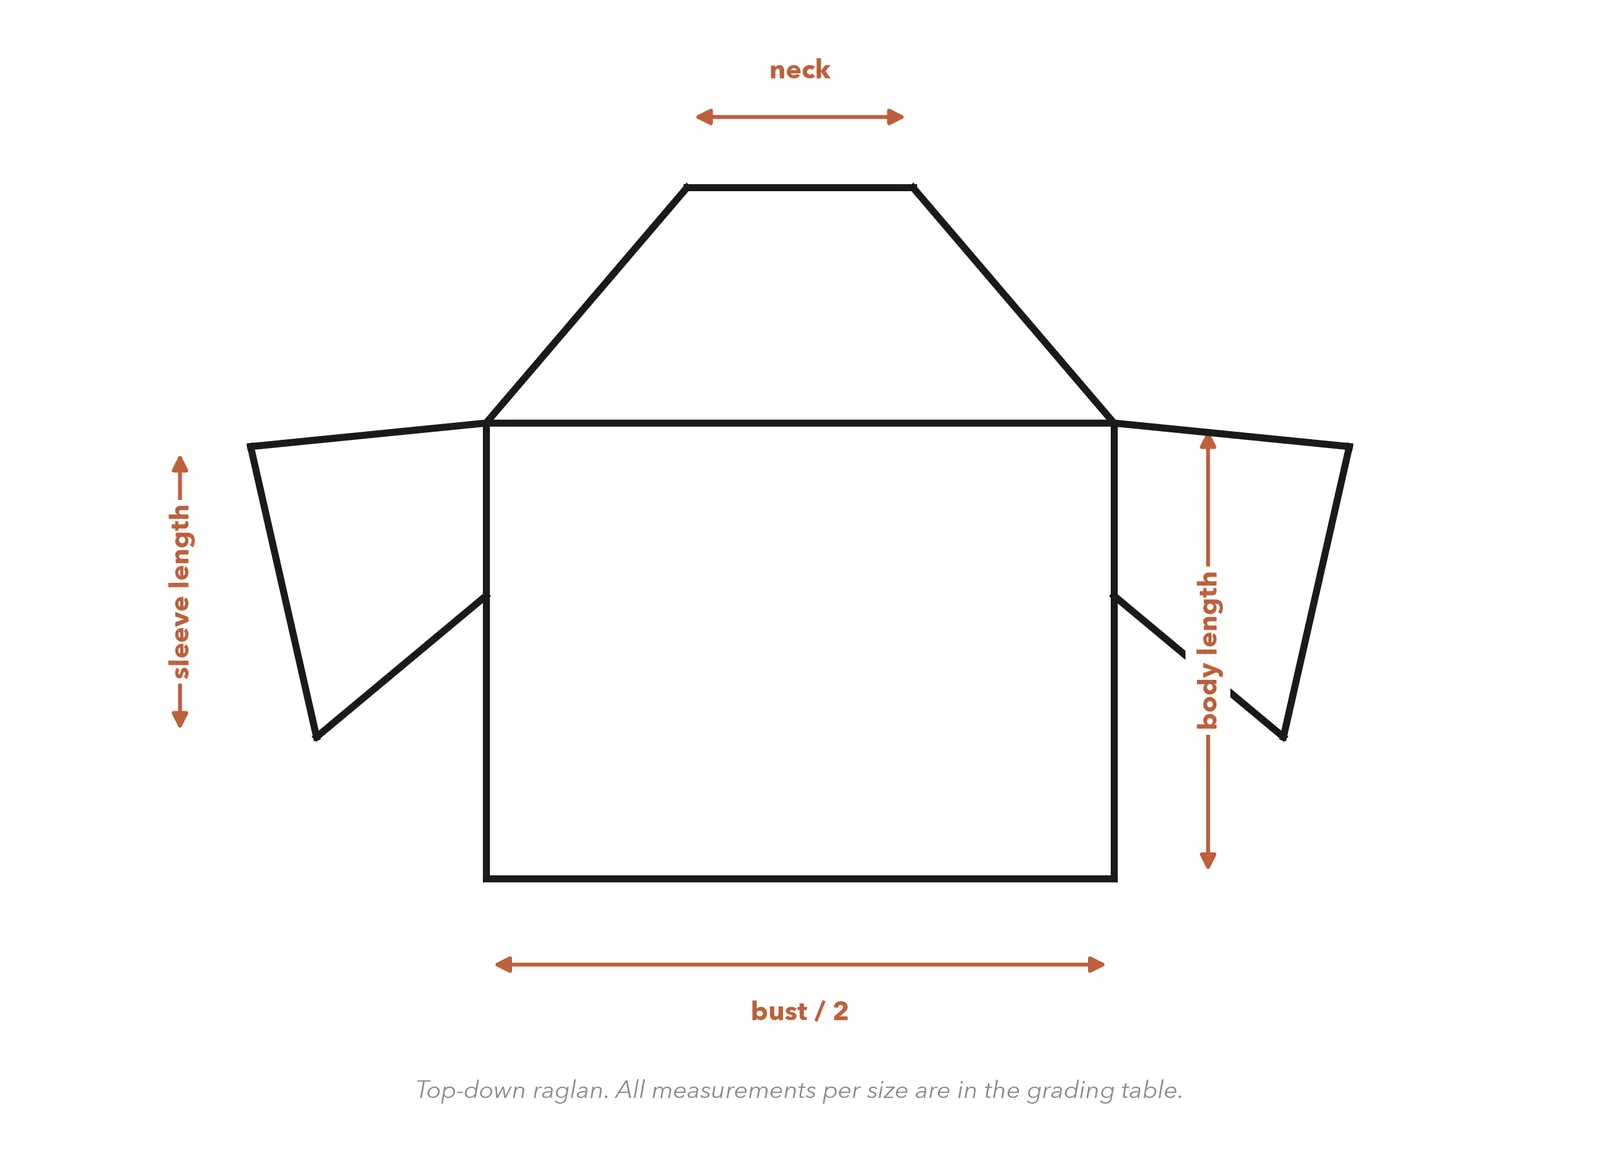
Size M: 107 cm bust × 60 cm long, 45 cm sleeve (42 in × 23½ in, 17¾ in sleeve). See the grading table.
Abbreviations
This pattern uses US crochet terms.
| ch | chain |
| hdc | half double crochet |
| hdc2tog | half double crochet 2 together (a decrease) |
| inc | increase — 2 hdc in the same stitch |
| dec | decrease |
| sc | single crochet |
| BLO | back loop only |
| sl st | slip stitch |
| st(s) | stitch(es) |
| rnd | round |
| rep | repeat |
| RS | right side |
Special stitches
What a raglan actually is
Look at the schematic. The yoke is a flat ring divided into four sections — back, sleeve, front, sleeve — and the four points where those sections meet are the raglan lines.
Every increase round adds two stitches at each of those four points: one to the section on either side. Eight stitches per round, and the ring grows outward as four straight diagonal seams. That is the entire idea.
Because the increases are always in the same four places, your markers do all the thinking. Place them once and move them up every round.
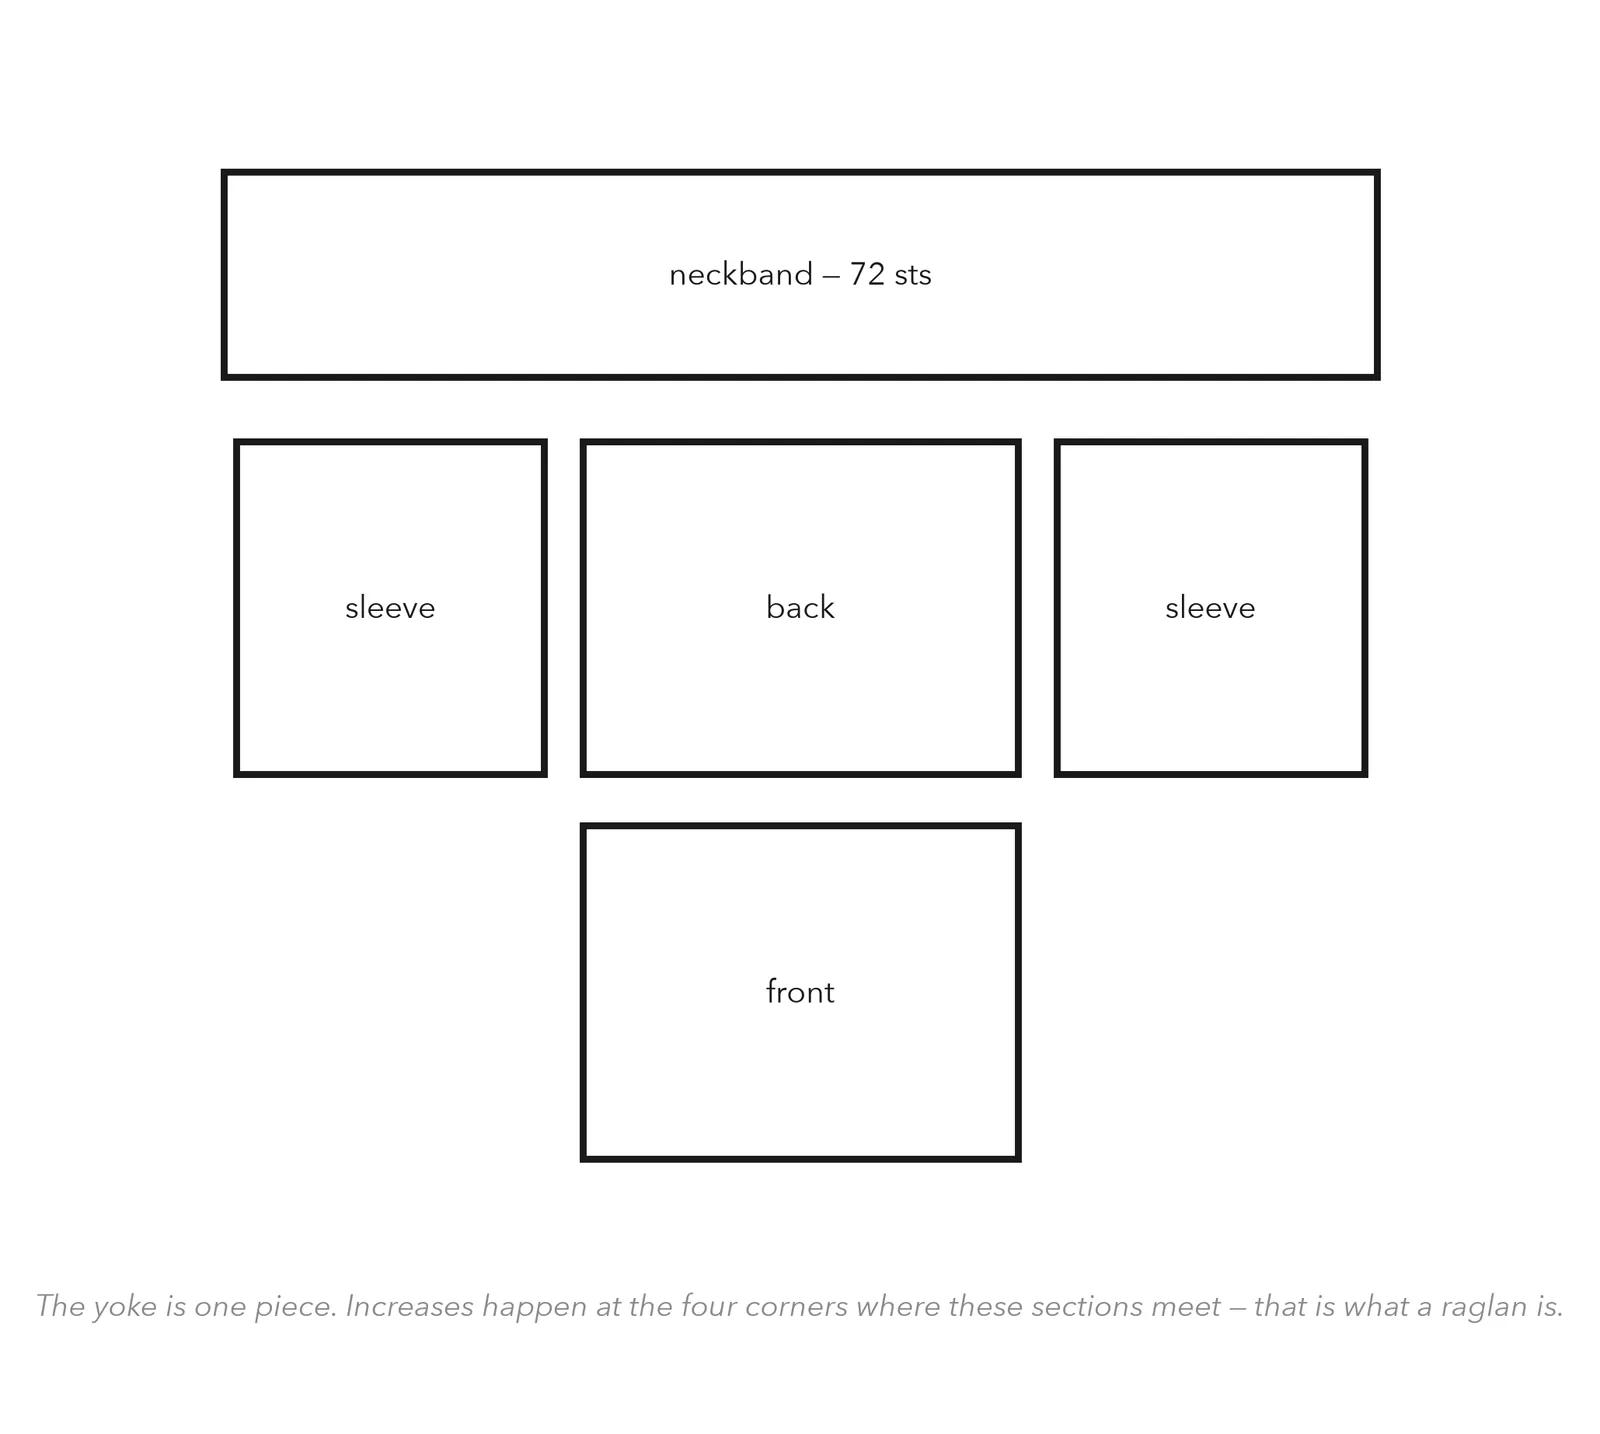
Increasing at a raglan point
Work in hdc to one stitch before the marker. Work 2 hdc in that stitch, move the marker, then work 2 hdc in the next stitch. Continue to the next marker and repeat.
You have added one stitch to the section before the marker and one to the section after it. Four markers, eight stitches per round.
Instructions
Neckband and yoke setup
Worked in the round from the neck down. Figures in brackets are S, M, L, XL and 2XL.
The yoke
Every round increases by eight: two stitches at each of the four raglan markers.
Separating the sleeves
The body
Straight down from the underarm with no shaping.
Sleeves — make 2
Worked from the held stitches down to the cuff, decreasing gradually.
Finishing
Close the two small gaps at each underarm from the inside, using the yarn tail and three or four stitches. Every raglan has these; every raglan needs them closed.
Weave in all ends — there will be more than you expect. Work each one into the back of a section of the same colour and reverse direction at least once so it cannot pull free.
Block the finished sweater. Wash it as you intend to wash it in future, press the water out in towels, and lay it flat on a dry towel in the shape you want it. Measure the bust and the length while it is damp and ease the fabric to match your grading table. Blocking evens out the stitches and lets the fabric relax into its true drape, and a sweater that looks slightly rough off the hook can look genuinely professional after it.
Let it dry completely before wearing. Then put it on and consider that you started this collection unable to make a slip knot.
If something has gone wrong
You have worked too many increase rounds for your gauge, so the ring is growing faster than your body needs. Stop increasing and work plain rounds — the yoke will still gain the depth it needs without gaining more width.
The opposite problem, and much more common. Work two or three more increase rounds, then compensate by chaining fewer stitches at the underarm so the body does not become too wide.
Work a round of single crochet around the neck edge, decreasing evenly by about 10 per cent. This tightens the opening without affecting anything else, and it is the standard fix.
Work the size whose stitch count comes closest to your desired finished bust at your gauge. Multiply your actual stitches-per-10 cm by the bust measurement you want and divide by 10 — then pick the size with the nearest body stitch count. This is what experienced makers do, and it is more reliable than fighting your own tension.
Write down the round numbers as you work the first sleeve — when you started decreasing, when you stopped, when you started the cuff. Trying each sleeve on separately does not work, because an arm feels different the second time.
Expected, and every raglan has them. Close them from the inside with a few stitches. Working extra firmly into the corners on the first sleeve round reduces them next time.
Caring for your finished piece
Wool: hand wash cool with wool detergent, or use a machine wool cycle only if the yarn label explicitly permits it. Press the water out in towels, never wring, and dry flat — a wet sweater hung on a line will stretch into a completely different garment. Store folded, not hung, for the same reason. Wash a sweater rarely; airing it does most of the work, and every wash shortens its life a little. Treated well, this is a garment that lasts decades.
What's next
Pattern 1 of 12
Back to the beginning
That is all twelve. You have gone from a slip knot to a fitted garment, and there is nothing left in this collection to teach you — which means the useful thing now is to go back. Remake Pattern 1 and look at how different your tension is. Then start changing things: work the cushion in the granny stitch, put cables on the beanie, make the shawl twice as deep. Every pattern here is a set of principles wearing a project as a disguise, and you already know all of them.